

企业级高性能Web服务之Nginx详解
企业级高性能web服务器之Nginx详解
一、Nginx 高并发
1.1 同步与异步
同步与异步的重点在消息通知的方式上,也就是调用结果的通知方式不同。
同步:当一个同步调用发出去后,调用者要一直等待调用的结果通知后,才能进行后续的执行。
异步:当一个异步调用发出去后,调用者不必一直等待调用结果的返回,异步调用,要想获得结果,一般有两种方式:
1、主动轮询异步调用的结果;
2、被调用方通过callback(回调通知)来通知调用方调用结果。实例解释:
同步取快递:小明收到快递将送达的短信,在楼下一直等到快递送达。
异步取快递:小明收到快递将送达的短信,快递到楼下后,小明再下楼去取。
异步取快递,小明知道快递到达楼下有两种方式:
1、不停的电话问快递小哥到了没有,即主动轮询;
2、快递小哥到楼下后,打电话通知小明,然后小明下楼取快递,即回调通知。1.2 阻塞与非阻塞
阻塞与非阻塞的重点在于进/线程等待消息时候的行为,也就是在等待消息的时候,当前进/线程是挂起状态,还是非挂起状态。
阻塞:调用在发出去后,在消息返回之前,当前进/线程会被挂起,直到有消息返回,当前进/线程才会被激活
非阻塞:调用在发出去后,不会阻塞当前进/线程,而会立即返回。实例解释:
阻塞取快递:小明收到快递即将送达的信息后,什么事都不做,一直专门等快递。
非阻塞取快递:小明收到快递即将送达的信息后,等快递的时候,还一边敲代码、一边刷微信。
同步与异步,重点在于消息通知的方式;阻塞与非阻塞,重点在于等消息时候的行为。所以,就有了下面4种组合方式
1)同步阻塞:小明收到信息后,啥都不干,等快递;
2)同步非阻塞:小明收到信息后,边刷微博,边等着取快递;
3)异步阻塞:小明收到信息后,啥都不干,一直等着快递员通知他取快递;
4)异步非阻塞:小明收到信息后,边刷着微博,边等快递员通知他取快递。大部分程序的I/O模型都是同步阻塞的,单个进程每次只在一个文件描述符上执行I/O操作,每次I/O系统调用都会阻塞,直到完成数据传输。传统的服务器采用的就是同步阻塞的多进程模型。一个server采用一个进程负责一个request的方式,一个进程负责一个request,直到会话结束。进程数就是并发数,而操作系统支持的进程数是有限的,且进程数越多,调度的开销也越大,因此无法面对高并发。
Nginx采用了异步非阻塞的方式工作。我们先来先了解一下I/O多路复用中的epoll模型。
epoll模型:
当连接有I/O事件产生的时候,epoll就会去告诉进程哪个连接有I/O事件产生,然后进程就去处理这个事件。例如:小明家楼下有一个收发室,每次有快递到了,门卫就先代收并做了标记;然后通知小明去取送给小明的快递
为什么Nginx比其他web服务器并发高 ?(Nginx工作原理)
Nginx配置use epoll后,以异步非阻塞方式工作,能够轻松处理百万级的并发连接。
处理过程:每进来一个request,会有一个worker进程去处理。但不是全程的处理,处理到可能发生阻塞的地方。比如向后端服务器转发request,并等待请求返回。那么,这个处理的worker不会这么傻等着,他会在发送完请求后,注册一个事件:“如果后端服务器返回了,告诉我一声,我再接着干”。于是他就休息去了。此时,如果再有新的request进来,他就可以很快再按这种方式处理。而一旦后端服务器返回了,就会触发这个事件,worker才会来接手,这个request才会接着往下走。通过这种快速处理,快速释放请求的方式,达到同样的配置可以处理更大并发量的目的。
二、Nginx结构
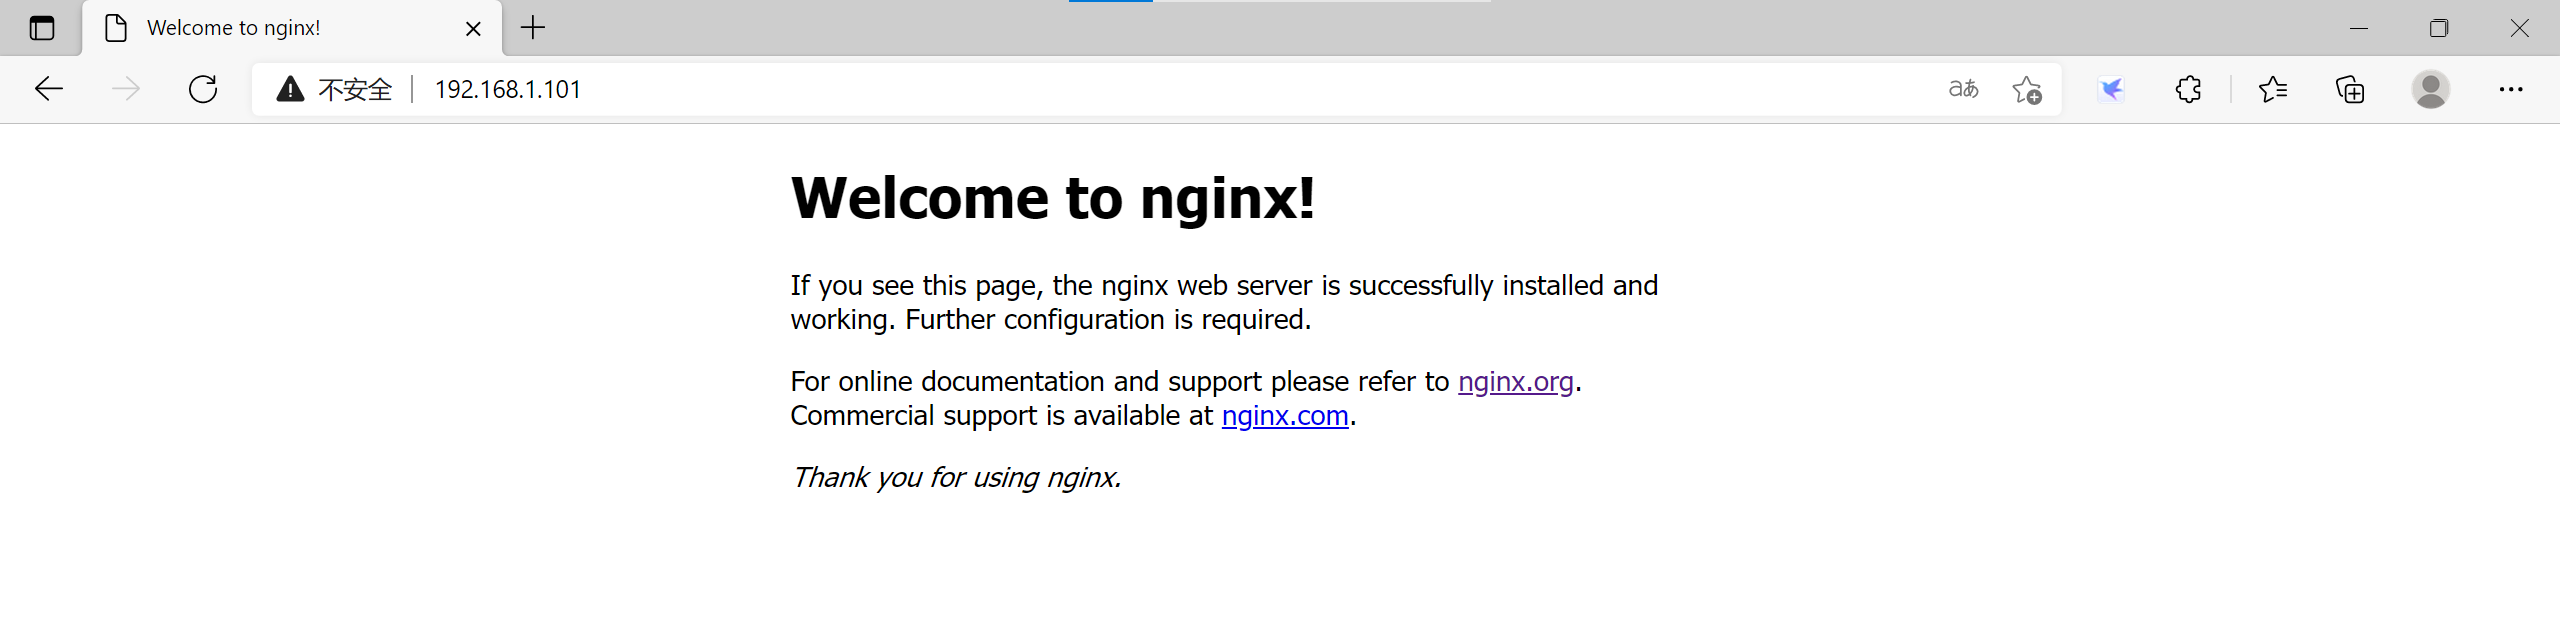
Nginx (engine x)是一个高性能的 HTTP和反向代理 web服务器,同时也提供了 IMAP/POP3/SMTP服务。Nginx是由伊戈尔·赛索耶夫为俄罗斯访问量第二的 Rambler.ru站点开发的,第一个公开版本0.1.0发布于 2004年 10月 4日。Nginx是一款轻量级的 Web服务器/反向代理服务器及电子邮件(IMAP/POP3)代理服务器,在BSD-like协议下发行。其特点是占有内存少,并发能力强。
2.1 工作架构
nginx有两种工作模式:master-worker模式和单进程模式。在 master-worker模式下,有一个 master进程和至少一个的 worker进程,单进程模式顾名思义只有一个进程。这两种模式有各自的特点和适用场景。
master-worker:
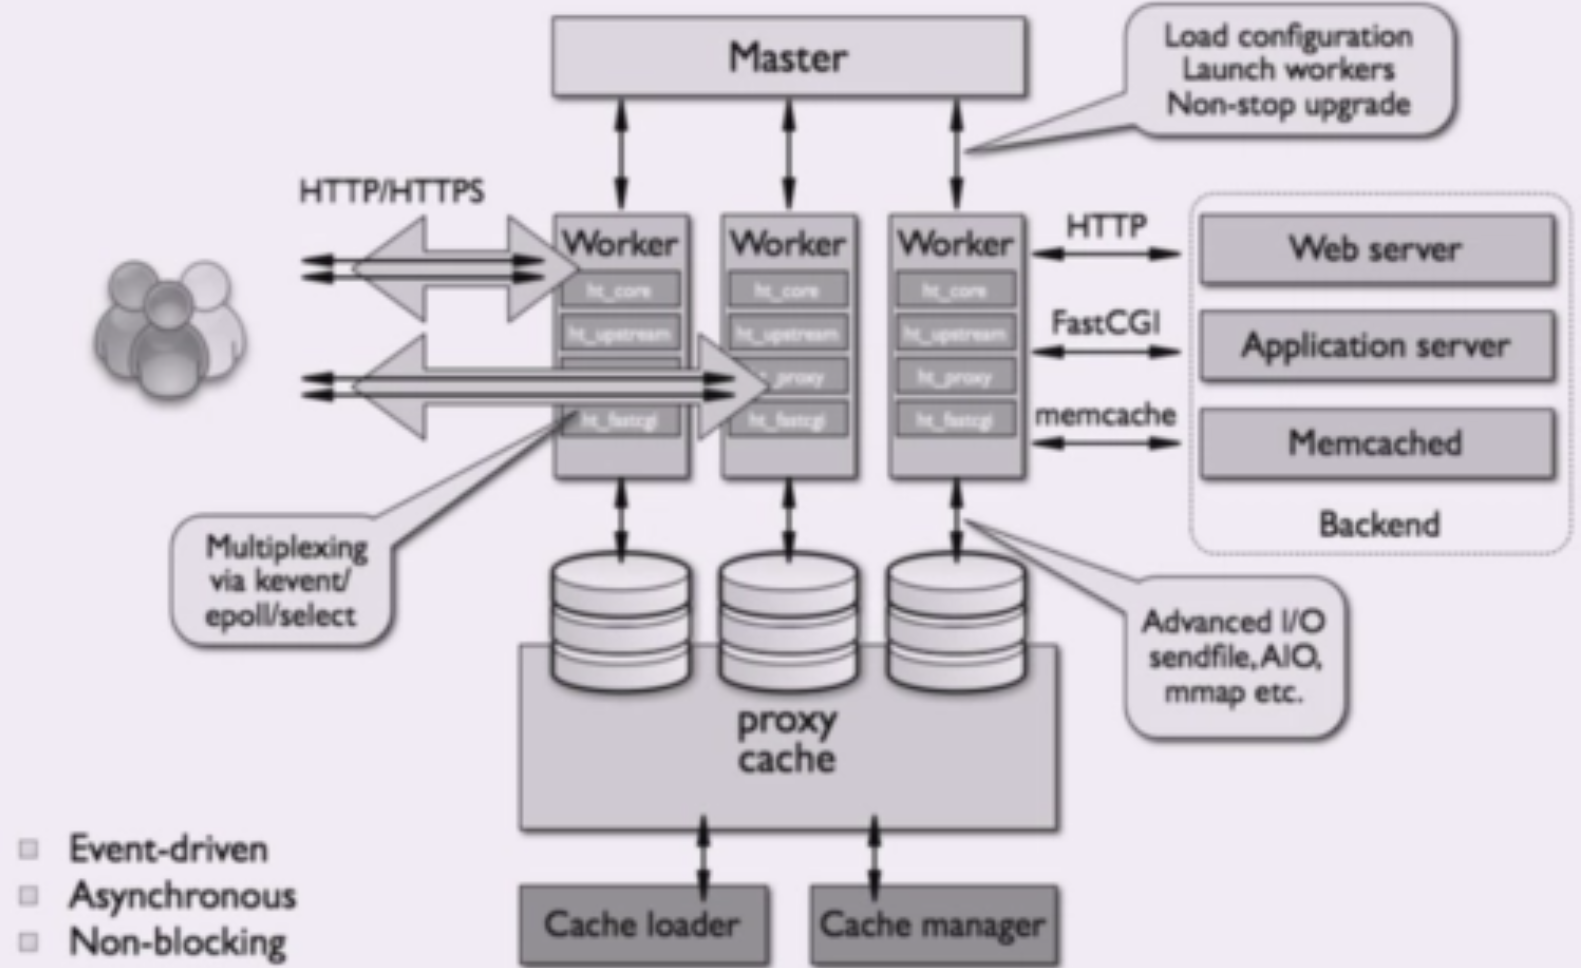
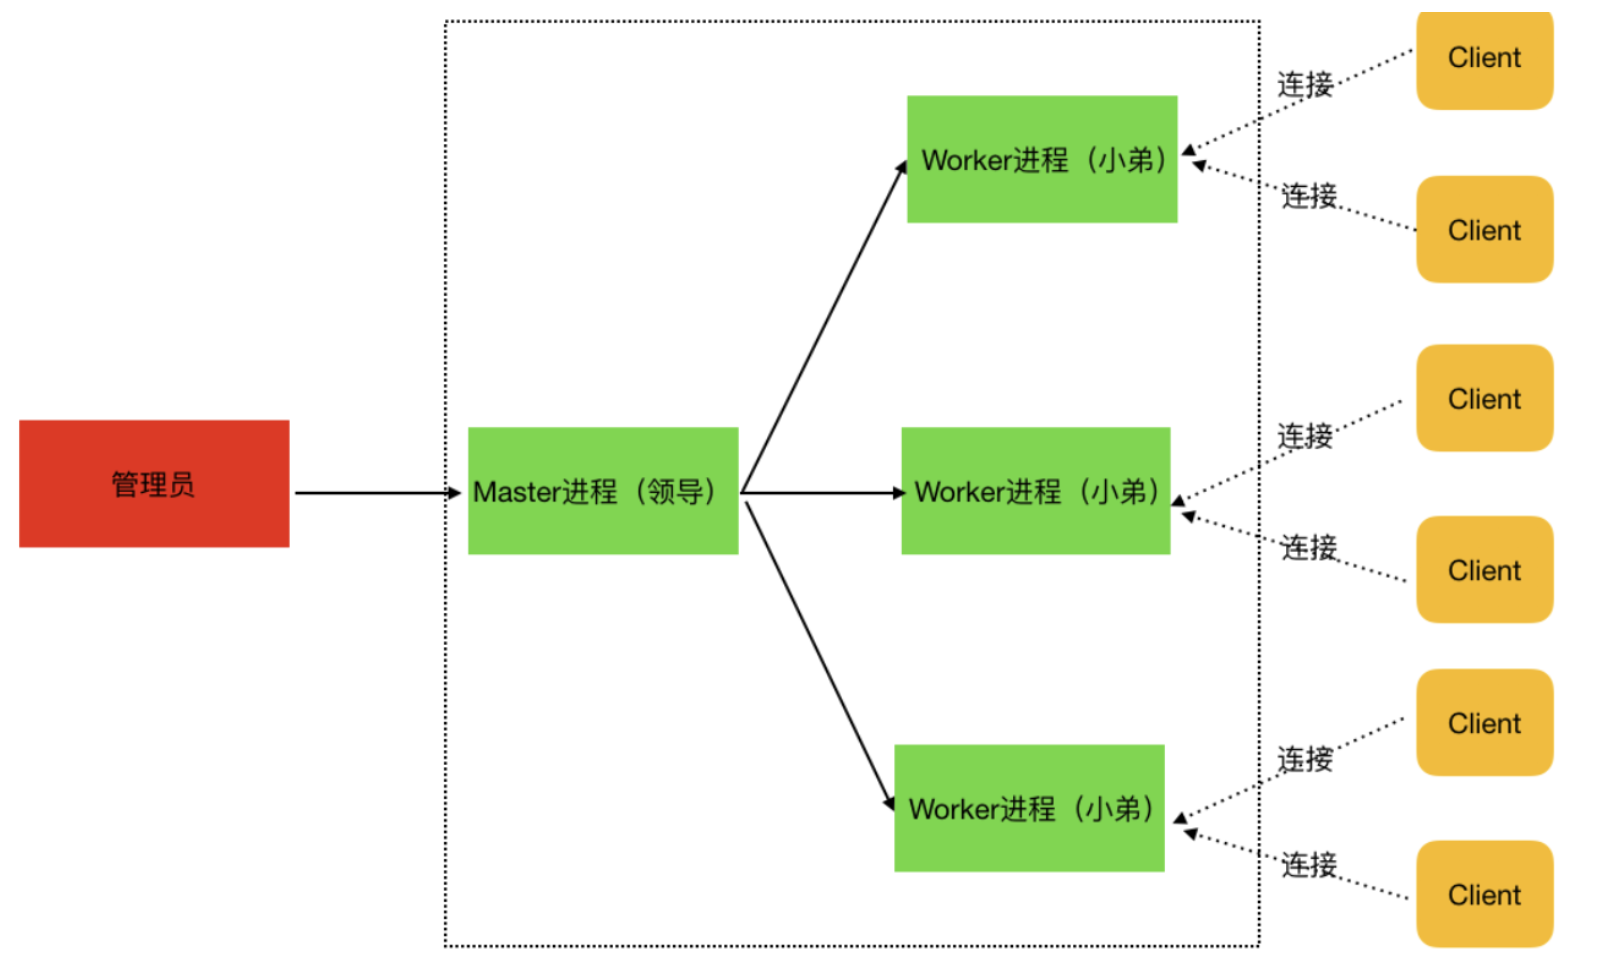
该模式下,nginx启动成功后,会有一个 master进程和至少一个的 worker进程。master进程负责处理系统信号,加载配置,管理 worker进程(启动,杀死,监控,发送消息/信号等)。worker进程负责处理具体的业务逻辑,也就是说,对外部来说,真正提供服务的是 worker进程。生产环境下一般使用
这种模式,因为这种模式有以下优点:
1.稳定性高,只要还有worker进程存活,就能够提供服务,并且一个 worker进程挂掉 master进程会立即启动一个新的 worker进程,保证worker进程数量不变,降低服务中断的概率。
2.配合linux的cpu亲和性配置,可以充分利用多核cpu的优势,提升性能
3.处理信号:配置重新加载/升级时可以做到尽可能少或者不中断服务(热重启)单进程模式:
单进程模式下,nginx启动后只有一个进程,nginx的所有工作都由这个进程负责。由于只有一个进程,因此可以很方便地利用 gdb等工具进行调试。该模式不支持 nginx的平滑升级功能,任何的信号处理都可能造成服务中断,并且由于是单进程,进程挂掉后,在没有外部监控的情况下,无法重启服务。因此,该模式一般只在开发阶段和调试时使用,生产环境下不会使用。(了解)
2.2 nginx进程结构
2.3 配置文件结构
2.3.1 全局配置段
#user nobody; #程序运行的用户和组
worker_processes 1; #启动进程,指定 nginx启动的工作进程数量,建议按照 cpu数目来指定,一般等于 cpu核心数目
#error_log logs/error.log; #定义错误日志
#error_log logs/error.log notice; #定义错误日志的级别
#error_log logs/error.log info;
#pid logs/nginx.pid; #程序Pid存放位置
events {
use epoll;
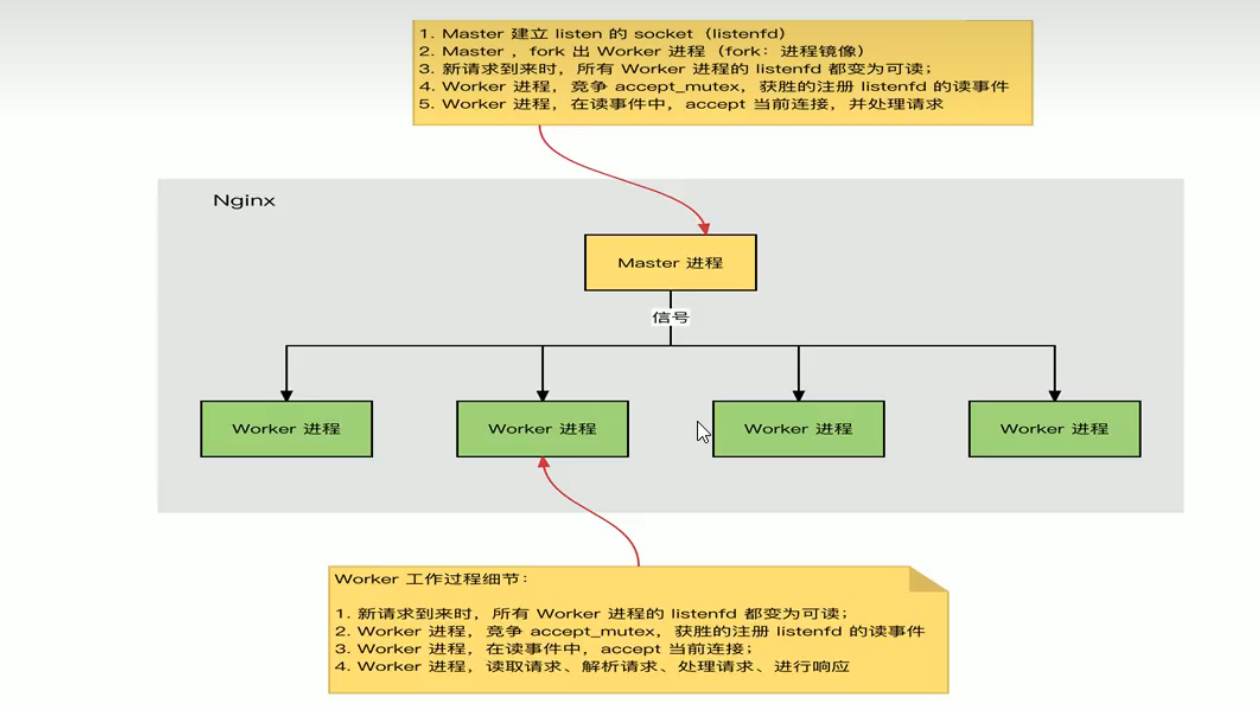
accept_mutex on; #同一时间的多个请求由worker进程轮流处理,而防止被同时唤醒多个worker,默认设置成off,新请求会唤醒所有的worker进程,此过程也被成为“惊群”,建议设置成on;
multi_accept on ; #on时nginx服务器的每个工作进程可以同时接受多个网络请求,如果设置成off,则每次只能接收一个请求,建议打开
worker_connections 1024; #单个工作进程的最大连接数,total_processes=worker_processes * worker_connections
}2.3.2 http段
#http段
http {
include mime.types; #文件的扩展名映射表
default_type application/octet-stream; #mime扩展支持的格式,代表.*
#log_format main '$remote_addr - $remote_user [$time_local] "$request" '
# '$status $body_bytes_sent "$http_referer" '
# '"$http_user_agent" "$http_x_forwarded_for"';
#access_log logs/access.log main;
sendfile on; #特殊的数据传输功能,用于开启文件高效传输模式,同时将tcp_nopush on 和tcp_nodelay on 两个指令设置为on,可防止网络及磁盘I/O阻塞,提升Nginx工作效率
#tcp_nopush on;
#keepalive_timeout 0; #会话保持的超时时间,单位为s,0代表不断开。
keepalive_timeout 65;
#gzip on; #压缩2.3.3 server段
#server段
server { #服务配置部分
listen 80; #监听的端口
server_name localhost; #服务器域名,可以有多个,用空格分来
#charset koi8-r;
#access_log logs/host.access.log main;
location / { #网站的根目录
root html; #相对路径的根目录
index index.html index.htm index.php;
} #默认首页的类型
#error_page 404 /404.html;
# redirect server error pages to the static page /50x.html
#
error_page 500 502 503 504 /50x.html; #错误页
location = /50x.html {
root html;
}
# proxy the PHP scripts to Apache listening on 127.0.0.1:80
#
#location ~ \.php$ { #反向代理
# proxy_pass http://127.0.0.1;
#}
# pass the PHP scripts to FastCGI server listening on 127.0.0.1:9000
#
location ~ \.php$ { #反向代理到php-fpm来处理php的页面
root html;
fastcgi_pass 127.0.0.1:9000;
fastcgi_index index.php;
fastcgi_param SCRIPT_FILENAME /scripts$fastcgi_script_name;
include fastcgi.conf;
}
# deny access to .htaccess files, if Apache's document root
# concurs with nginx's one
#
#location ~ /\.ht {
# deny all;
#}
}
}2.4 Nginx的模块
Nginx是由内核和模块构成。Nginx的模块从结构上,可以分为核心模块、基础模块和第三方模块。这些模块主要包括如下部分:
1、核心模块:HTTP模块、EVENT模块和MAIL模块。
2、基础模块:HTTP Access模块、HTTP FastCGI模块、HTTP Proxy模块和HTTP Rewrite模块。
3、第三方模块:HTTP Upstream Request Hash模块、Notice模块、HTTP Access Key模块和Limit_req模块等。
如果从功能上分,Nginx的模块又可以分为以下三类:
1、处理器模块(Handlers)。 此模块直接处理请求,并进行输出内容和修改headers信息等操作,处理器模块一般只能有1个。
2、过滤器模块(Filters)。 此模块主要对其他处理器模块输出的内容进行修改操作,最后由Nginx输出。
3、代理类模块(Proxies)。 此类模块主要与一些后端服务FastCGI等进行交互,实现服务代理和负载均衡等功能。
以下是 nginx 的常用模块的表格展示:
模块名称 | 功能 |
|---|---|
rewrite | 重写 URL |
proxy | 代理 |
ssl | SSL 加密 |
worker_processes | 进程数 |
event | 事件驱动模型 |
resize_file | 文件大小限制 |
http_access | HTTP 访问权限控制 |
http_limit_methods | HTTP 方法限制 |
http_limit_conn | HTTP 连接限制 |
http_limit_req_zone | HTTP 请求配额 zone |
http_auth_login | HTTP 认证登录 |
http_auth_pass | HTTP 认证授权 |
smtp | SMTP 代理 |
imap | IMAP 代理 |
http_autoindex | HTTP 自动展开目录 |
x_forwarded_for | 代理 IP 追踪 |
set_real_ip_from | 代理 IP 白名单 |
real_ip_header | 代理 IP 响应头 |
x_forwarded_proto | 代理协议追踪 |
x_forwarded_端口 | 代理端口追踪 |
模块名称 | 模块作用 |
|---|---|
ngx_http_access_module | 四层基于 IP 的访问控制,可以通过匹配客户端源 IP 地址进行限制 |
ngx_http_auth_basic_module | 状态页,使用 basic 机制进行用户认证,在编译安装 nginx 的时候需要添加编译参数--withhttp_stub_status_module,否则配置完成之后监测会是提示语法错误 |
ngx_http_stub_status_module | 状态统计模块 |
ngx_http_gzip_module | 文件的压缩功能 |
ngx_http_gzip_static_module | 静态压缩模块 |
ngx_http_ssl_module | nginx 的 https 功能 |
ngx_http_rewrite_module | 重定向模块,解析和处理 rewrite 请求 |
ngx_http_referer_module | 防盗链功能,基于访问安全考虑 |
ngx_http_proxy_module | 将客户端的请求以 http 协议转发至指定服务器进行处理 |
ngx_stream_proxy_module | 将客户端的请求以 tcp 协议转发至指定服务器处理 |
ngx_http_fastcgi_module | 将客户端对 php 的请求以 fastcgi 协议转发至指定服务器助理 |
ngx_http_uwsgi_module | 将客户端对 Python 的请求以 uwsgi 协议转发至指定服务器处理 |
ngx_http_headers_module | 可以实现对头部报文添加指定的 key 与值 |
ngx_http_upstream_module | 负载均衡模块,提供服务器分组转发、权重分配、状态监测、调度算法等高级功能 |
ngx_stream_upstream_module | 后端服务器分组转发、权重分配、状态监测、调度算法等高级功能 |
ngx_http_fastcgi_module | 实现通过 fastcgi 协议将指定的客户端请求转发至 php-fpm 处理 |
ngx_http_flv_module | 为 flv 伪流媒体服务端提供支持 |
三、Nginx的基本配置管理
1.注意配置文件中的结尾有;作为结束~!(切记!)
2.每次实验修改完配置文件后需要重启 nginx才会生效worker_rlimit_nofile 65536
3.1 nginx的信号
kill 命令 传给信号给进程 Nginx的主进程(master进程)
TERM INT(快速退出,当前的请求不执行完成就退出)
QUIT (优雅退出,执行完当前的请求后退出)
HUP(重新加我配置文件,用新的配置文件启动新worker进程,井优雅的关闭旧的worker进程)
USR1 (重新打开日志文件)
USR2(平滑的开级nginx二进制文件 拉起一个新的主进程,旧主进程不停止)
WINCH(优雅的关闭worker进程)
使用语法:
kill 选项参数   pid     ##关闭
kill -INT  / kill -TERM   pid      ##快速关闭
kill -QUIT    pid      ##优雅关闭
kill -WINCH   pid      ##优雅的关闭worker进程
[root@lnmp/usr/local/src]$ wget https://sourceforge.net/projects/pcre/files/pcre/8.41/pcre-8.41.tar.gz
[root@lnmp/usr/local/src]$ wget https://nginx.org/download/nginx-1.18.0.tar.gz
<p>[root@lnmp/usr/local/src]$ tar xf pcre-8.41.tar.gz
[root@myx01/usr/local/src/pcre-8.41]$ ./configure --prefix=/usr/local/pcre
[root@myx01/usr/local/src/pcre-8.41]$ make -j 8 && make install -j 8</p>
<p>[root@lnmp/usr/local/src]$ tar xf nginx-1.18.0.tar.gz
[root@lnmp/usr/local/src/nginx-1.18.0]$ ./configure --prefix=/usr/local/nginx --with-http_stub_status_module --with-http_ssl_module --with-http_v2_module --with-http_gunzip_module --with-http_sub_module --with-http_flv_module --with-http_mp4_module --user=nginx --group=nginx
[root@lnmp/usr/local/src/nginx-1.18.0]$ make -j 8 && make install -j 8
[root@lnmp/usr/local/nginx/sbin]$ ln -s /usr/local/nginx/sbin/nginx /usr/sbin/nginx
[root@lnmp/usr/local/nginx/sbin]$ useradd -M -s /sbin/nologin nginx</p>
<p>[root@lnmp/usr/local/nginx/sbin]$ cat /lib/systemd/system/nginx.service
[Unit]
Description=nginx
After=network.target
[Service]
Type=forking
PIDFile=/usr/local/nginx/logs/nginx.pid
ExecStart=/usr/local/nginx/sbin/nginx
ExecReload=/bin/kill -s HUP $MAINPID
ExecStop=/bin/kill -s QUIT $MAINPID
PrivateTmp=true
[Install]
WantedBy=multi-user.target</p>
<p>[root@lnmp/usr/local/nginx/sbin]$ chmod 754 /lib/systemd/system/nginx.service</p>
<p>[root@lnmp/usr/local/src/nginx-1.18.0]$ nginx -v
nginx version: nginx/1.18.0</p>
<p>[root@lnmp/usr/local/nginx/sbin]$ systemctl start nginx
[root@lnmp/usr/local/nginx/sbin]$ ps -ef | grep nginx
root 9263 1 0 11:13 ? 00:00:00 nginx: master process /usr/local/nginx/sbin/nginx
nginx 9264 9263 0 11:13 ? 00:00:00 nginx: worker process
root 9266 9089 0 11:13 pts/0 00:00:00 grep --color=auto nginx3.2 平滑升级
升级软件版本之后,需要启动新的版本,启动不了,端口已经被占用
如果直接把旧版本的服务停止掉,会影响线上业务的使用
最佳解决办法:
1、旧的不先停掉
2、新的又可以起来
3、旧的和新的同时提供服务,旧的请求完成之后,就停掉旧进程
-USR2 平滑启动一个进程(平滑升级)
-WINCH 优雅的关闭子进程
-QUIT 优雅关闭主进程3.2.1 编译安装新的版本
本次我们安装nginx-1.20的版本,获取老版本的编译参数可以使用./nginx -V来获取
升级新版本,需要和新软件的版本安装在和旧版本一致的位置上,如下:
[root@lnmp/usr/local/src]$ nginx -v
nginx version: nginx/1.18.0</p>
<p>[root@lnmp/usr/local/src]$ wget https://nginx.org/download/nginx-1.20.0.tar.gz</p>
<p>[root@lnmp/usr/local/src]$ tar xf nginx-1.20.0.tar.gz
[root@lnmp/usr/local/src/nginx-1.20.0]$ ./configure --prefix=/usr/local/nginx --with-http_stub_status_module --with-http_ssl_module --with-http_v2_module --with-http_gunzip_module --with-http_sub_module --with-http_flv_module --with-http_mp4_module --with-pcre=/usr/local/src/pcre-8.41 --user=nginx --group=nginx
[root@lnmp/usr/local/src/nginx-1.20.0]$ make -j 8 && make -j 8 install安装完成后,会自动把旧版本的nginx备份成nginx.old。
[root@lnmp/usr/local/nginx/sbin]$ ls
nginx  nginx.old
如果想旧版本和新版本同时运行
kill -USR2 主进程号(旧nginx pid)如果只运行新版本,先查看旧版本的主进程号,并使用kill -WINCH 优雅的关闭子进程,再关闭旧的主进程
kill -WINCH 旧的主进程号
kill -QUIT  旧的主进程号
3.2.2 版本升级的第二种方式
我们在解压新的版本./configure之后,在新版本的安装目录下有个Makefile文件,我们可以打开这个文件查看一下内容,也可以使用upgrade进行升级,其实这是nginx给我们提供的默认升级方式。
[root@lnmp/usr/local/src/nginx-1.20.0]$ cat Makefile</p>
<p>default:	build</p>
<p>clean:
rm -rf Makefile objs</p>
<p>.PHONY:	default clean</p>
<p>build:
$(MAKE) -f objs/Makefile</p>
<p>install:
$(MAKE) -f objs/Makefile install</p>
<p>modules:
$(MAKE) -f objs/Makefile modules</p>
<p>upgrade:
/usr/local/nginx/sbin/nginx -t</p>
<pre><code>kill -USR2 `cat /usr/local/nginx/logs/nginx.pid`
sleep 1
test -f /usr/local/nginx/logs/nginx.pid.oldbin

kill -QUIT `cat /usr/local/nginx/logs/nginx.pid.oldbin`
.PHONY: build install modules upgrade
操作步骤1:将新的nginx的二进制文件删除,恢复旧的版本
[root@lnmp/usr/local/nginx/sbin]$ ls
nginx  nginx.old</p>
<p>[root@lnmp/usr/local/nginx/sbin]$ mv nginx.old nginx
mv:是否覆盖"nginx"? y
操作步骤2:重新启动nginx
[root@lnmp sbin]# /etc/init.d/nginx_php.sh stop
nginx service stop success!
[root@lnmp sbin]# /etc/init.d/nginx_php.sh start
nginx service start success!
[root@lnmp sbin]# ./nginx -v
nginx version: nginx/1.18.0
操作步骤3:进入新的nginx版本,进行重新编译安装
[root@lnmp/usr/local/src]$ wget https://nginx.org/download/nginx-1.20.2.tar.gz</p>
<p>[root@lnmp/usr/local/src]$ tar xf nginx-1.20.2.tar.gz
[root@lnmp/usr/local/src]$ cd nginx-1.20.2/</p>
<p>[root@lnmp/usr/local/src/nginx-1.20.2]$ ./configure --prefix=/usr/local/nginx --with-http_stub_status_module --with-http_ssl_module --with-http_v2_module --with-http_gunzip_module --with-http_sub_module --with-http_flv_module --with-http_mp4_module --with-pcre=/usr/local/src/pcre-8.41 --user=nginx --group=nginx
[root@lnmp/usr/local/src/nginx-1.20.2]$ make install && make upgrade ##这一步是在更新nginx</p>
<p>[root@lnmp/usr/local/src/nginx-1.20.2]$ nginx -v
nginx version: nginx/1.20.2</p>
<p>[root@lnmp/usr/local/src/nginx-1.20.2]$ ps -ef | grep nginx
root 41241 1 0 11:36 ? 00:00:00 nginx: master process /usr/local/nginx/sbin/nginx
nginx 41243 41241 0 11:36 ? 00:00:00 nginx: worker process
root 41251 9089 0 11:36 pts/0 00:00:00 grep --color=auto nginx</p>
<p>[root@lnmp/usr/local/src/nginx-1.20.2]$ kill -USR2 41241
[root@lnmp/usr/local/src/nginx-1.20.2]$ kill -WINCH 41241
[root@lnmp/usr/local/src/nginx-1.20.2]$ kill -QUIT 41241</p>
<p>[root@lnmp/usr/local/src/nginx-1.20.2]$ ps -ef | grep nginx
root 41252 1 0 11:37 ? 00:00:00 nginx: master process /usr/local/nginx/sbin/nginx
nginx 41253 41252 0 11:37 ? 00:00:00 nginx: worker process
root 41273 9089 0 11:42 pts/0 00:00:00 grep --color=auto nginx
操作步骤4:重新访问查看

3.3 Nginx的状态统计
官方网站:https://nginx.org/en/docs/http/ngx_http_stub_status_module.html
a、安装 nginx时将--with-http_stub_status_module模块开启
b、修改 nginx配置文件(写入要访问的 server标签中)
 [root@myx01/usr/local/nginx/sbin]$ nginx -V 	# 查看安装了哪些模块</p>
<p>
#location / {
#    root   html;
#    index  index.html index.htm;
#}</p>
<pre><code>    #error_page  404              /404.html;
    location /nginx_status{
            stub_status on;
            access_log off;
    }
c、重启服务:systemctl restart nginx
d、客户端访问网址:http://IP/nginx_status
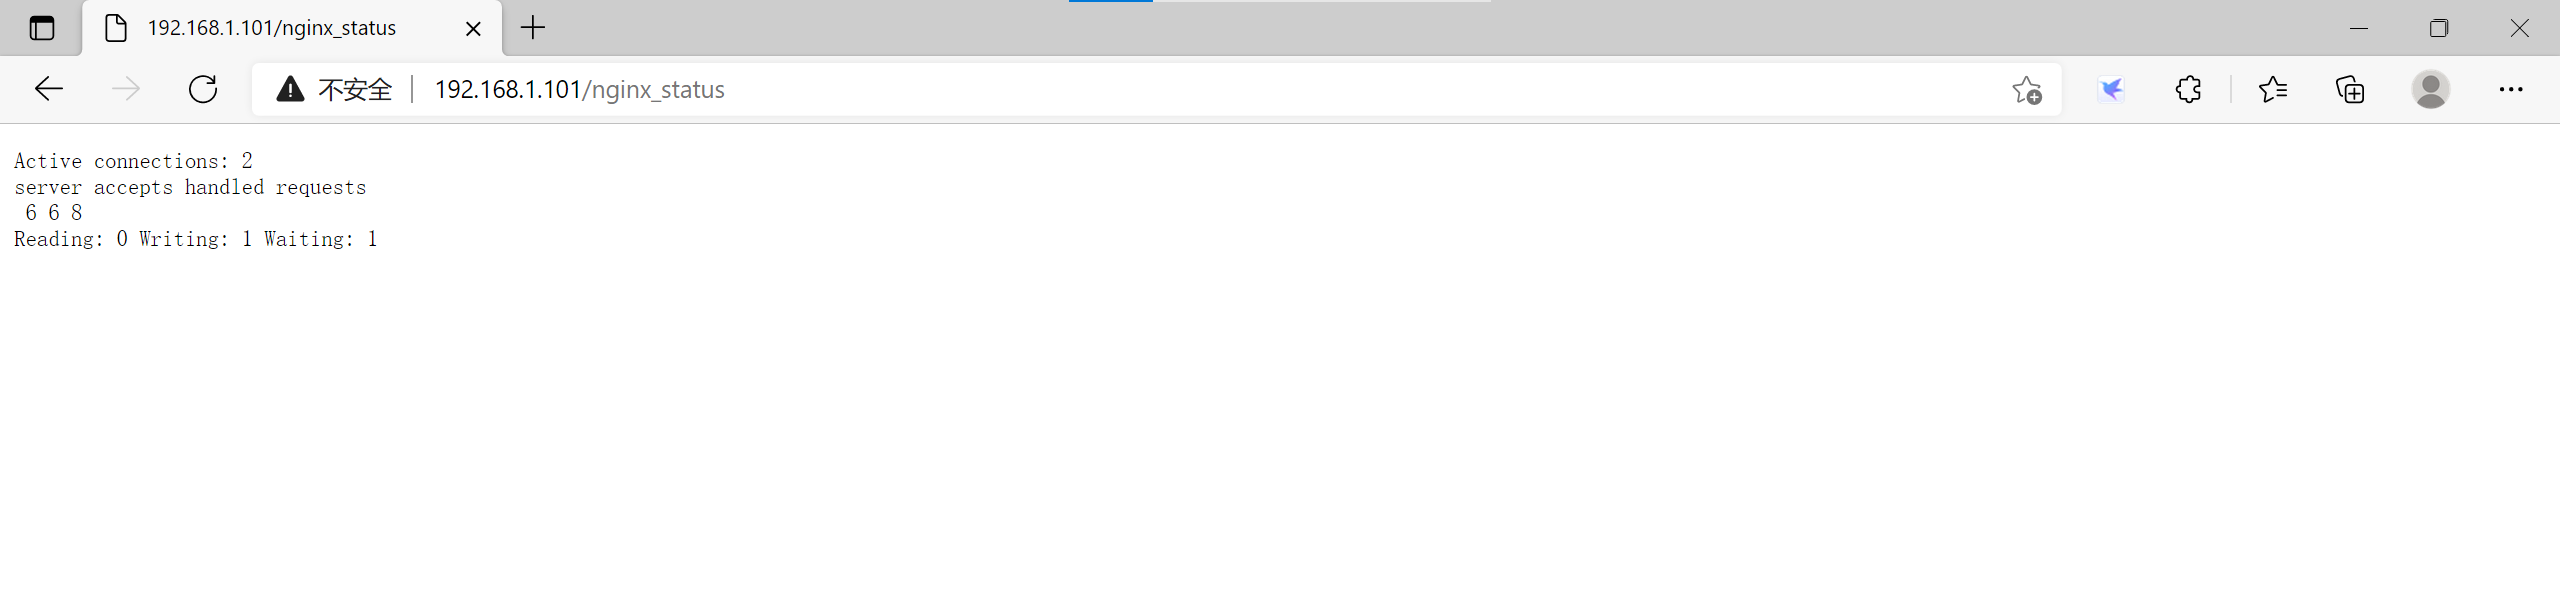
"Active connections"表示当前的活动连接数;
"server accepts handled requests"表示已经处理的连接信息
三个数字依次表示已处理的连接数、成功的 TCP握手次数、已处理的请求数,后期我们在学到zabbix的部分的时候,我们会利用这个模块来对nginx的性能进行监控。
Active connections: #当前处于活动状态的客户端连接数,包括连接等待空闲连接数=reading+writing+waiting
accepts: #统计总值,Nginx自启动后已经接受的客户端请求的总数。
handled: #统计总值,Nginx自启动后已经处理完成的客户端请求总数,通常等于accepts,除非有因worker-connections限制等被拒绝的连按
requests: #统计总值,Nqinx自启动后客户端发来的总的请求数。
Reading: #当前状态,正在读取客户端请求报文首部的连接的连接数,数值越大,说明排队现象严重,性能不足
writing: #当前状态,正在向客户端发送响应报文过程中的连接数,数值越大,说明访问量很大
Waiting: #当前状态,正在等侍客户端发出请求的空闲连接数,开启 keep-alive的情况下,这个值等 active - (readina+writing).
3.4 目录保护
官方网站:https://nginx.org/en/docs/http/ngx_http_auth_basic_module.html
a、原理和 apache的目录保护原理一样(利用上一个实验接着完成)
b、在状态统计的 location中添加:
auth_basic "Welcome to nginx_status!";
auth_basic_user_file /usr/local/nginx/html/htpasswd.nginx;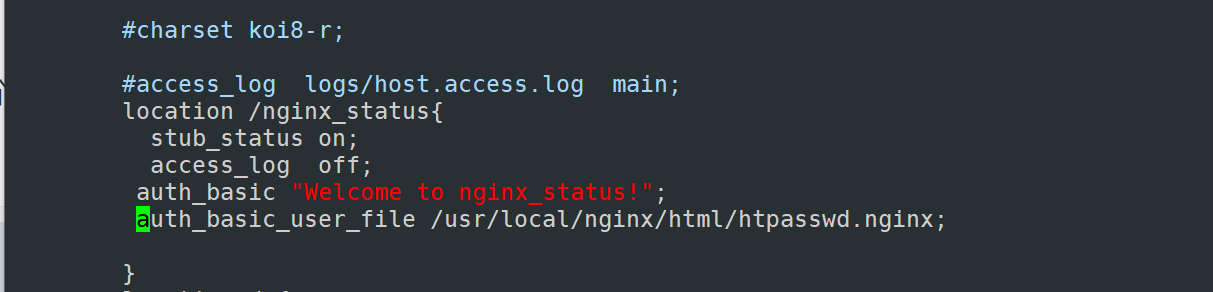
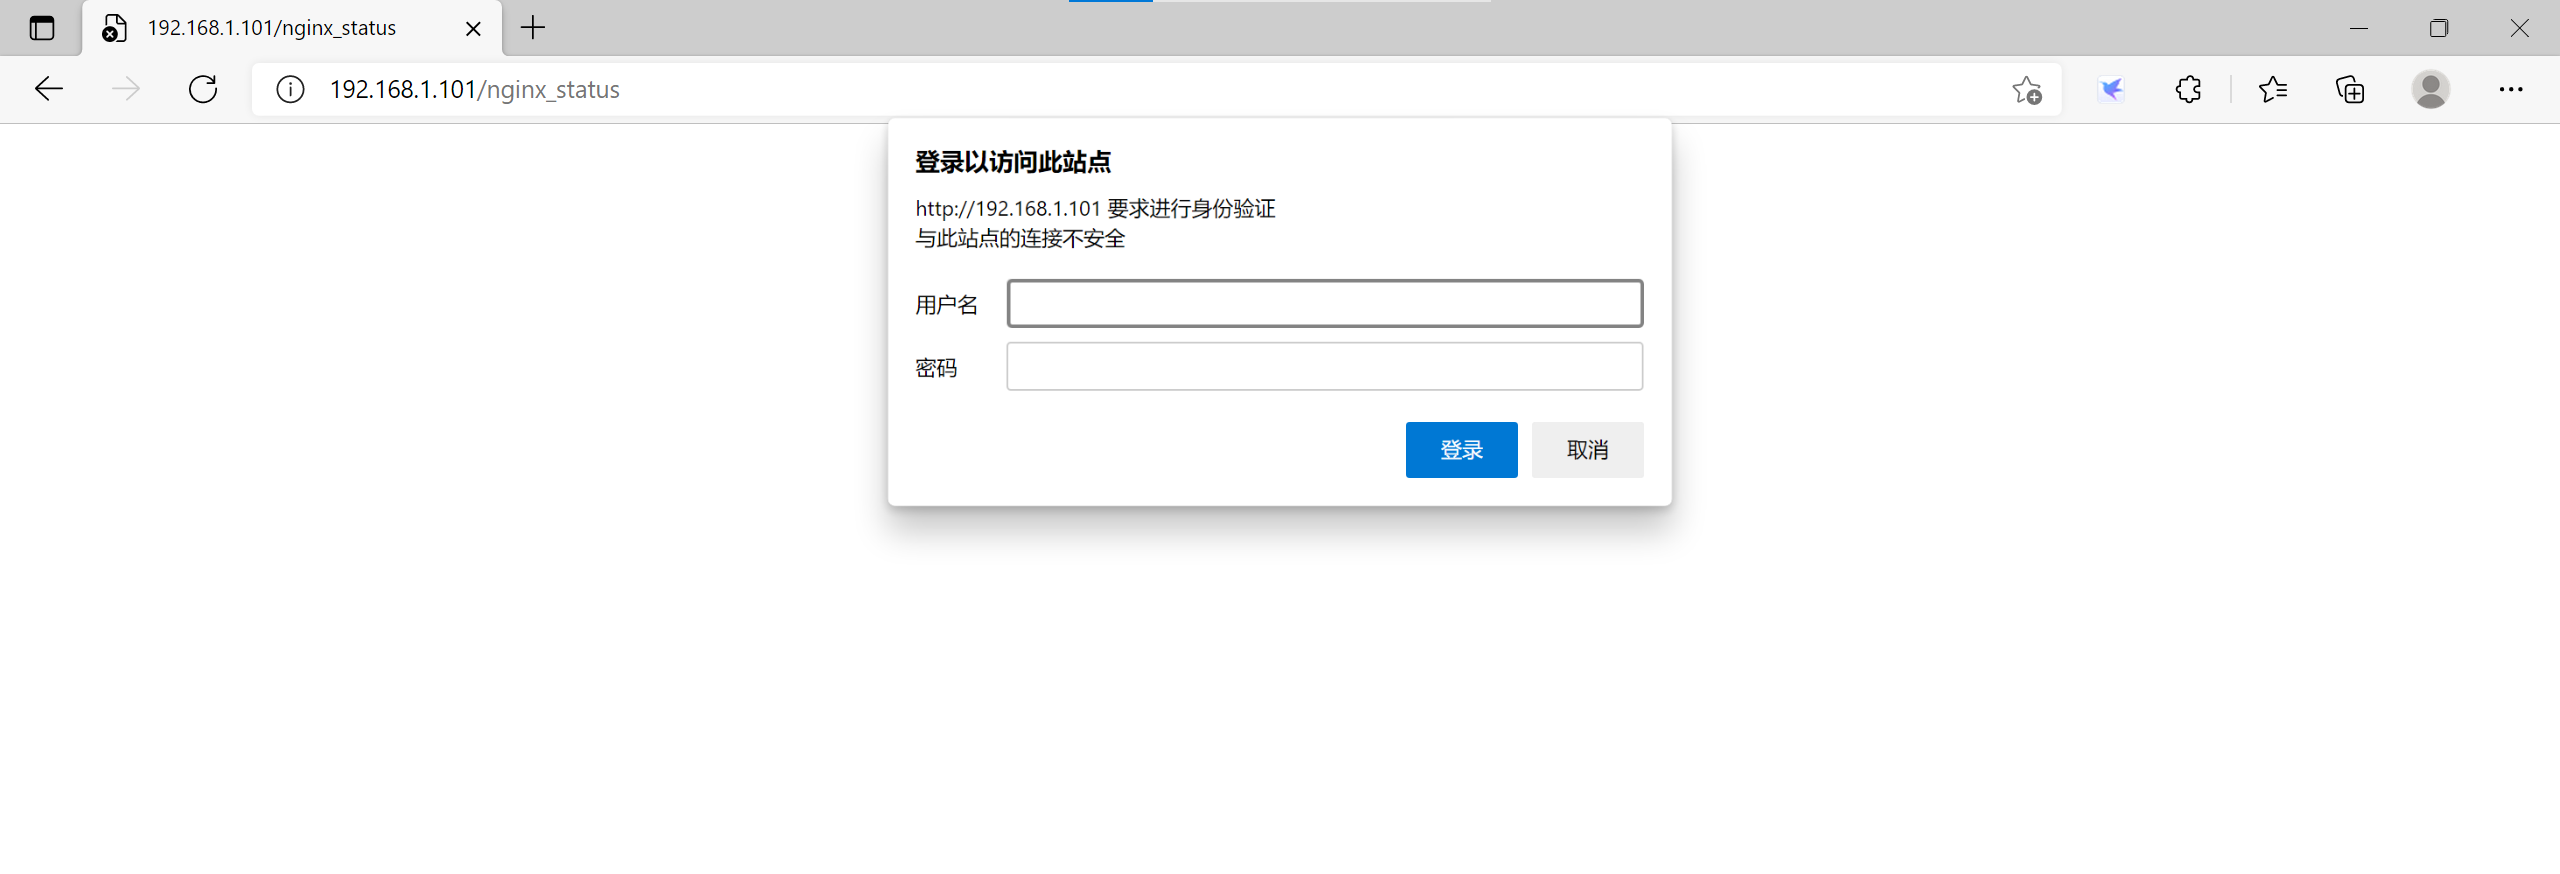
c、使用 http的命令 htpasswd进行用户密码文件的创建(生成在上面指定的位置)
[root@localhost conf]# htpasswd -c /usr/local/nginx/html/htpasswd.nginx user1
New password:
Re-type new password:
Adding password for user user1
注意:第二次创建用户加-b选项 # 如果报错就取消-b选项注意:htpasswd命令是没有的,centos需要安装httpd—tools,ubuntu需要安装apache2-utils
d、重启 nginx并再次访问统计页面
3.5 基于 IP的身份验证(访问控制)
官方网站:https://nginx.org/en/docs/http/ngx_http_access_module.html
a、接着上一个实验完成操作
b、在状态统计的 location中添加:
allow 192.168.1.130;
deny 192.168.1.0/24;
仅允许 192.168.1.130访问服务器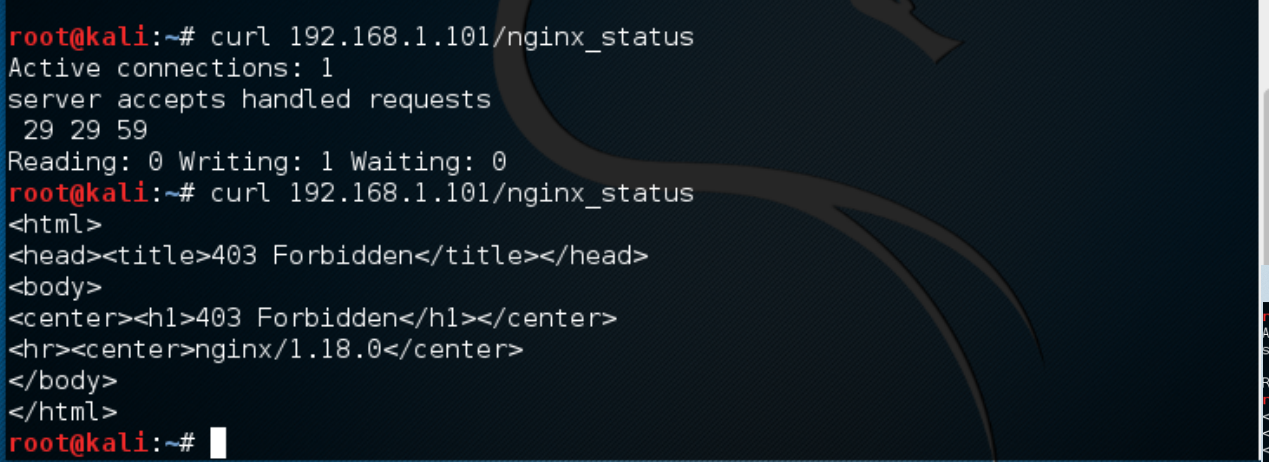
3.6 nginx的虚拟主机(基于域名)
a、提前准备好两个网站的域名,并且规划好两个网站网页存放目录
b、在 Nginx主配置文件中并列编写两个 server标签,并分别写好各自信息编写nginx.conf配置文件
[root@lnmp/usr/local/nginx/conf]$ vim nginx.conf
include /apps/nginx/conf/conf.d/*.conf;</p>
<p>[root@lnmp/usr/local/nginx/conf/conf.d]$ cat it.myx.com.conf
server {
listen 80;
server_name it.myx.com;
index index.html index.htm index.php;
root  html/it;
}</p>
<p>[root@lnmp/usr/local/nginx/conf/conf.d]$ cat bbs.myx.com.conf
server {
listen 80;
server_name bbs.myx.com;
index index.html index.htm index.php;
root  html/bbs;
}
[root@lnmp/usr/local/nginx/html]$ cat /usr/local/nginx/html/it/index.html
it
[root@lnmp/usr/local/nginx/html]$ cat /usr/local/nginx/html/bbs/index.html
bbsc、添加本地hosts的解析
[root@lnmp/usr/local/nginx/html]$ vim /etc/hosts
10.0.0.8 it.myx.com
10.0.0.8 bbs.myx.com
d、重载配置
[root@lnmp/usr/local/nginx/html]$ systemctl reload nginx</p>
<h2 id="[root@lnmp/usr/local/nginx/html]$ curl it.myx.com
it
[root@lnmp/usr/local/nginx/html]$ curl bbs.myx.com
bbs</code></pre><p style="text-align: start; ">e、访问测试</p><ul><li><p style="text-align: start; "><strong>Windows Host解析文件:C:\Windows\System32\drivers\etc\hosts</strong></p></li></ul><pre><code class="language-shell"># 添加
10.0.0.8 www.myx.com
10.0.0.8 www.it.com</code></pre><p style="text-align: start; "><img loading="lazy" src="/upload/image-dgxd.png" width="944px" height="235.75px" style="display: inline-block"></p><p style="text-align: start; "></p><h5 style="text-align: start; " id="heading-22"><strong>3.7 nginx的虚拟主机(基于端口)</strong></h5><pre><code> server {
listen 80;
server_name it.hopu.com;
index index.html index.htm index.php;
root html/it;
}
server {
listen 81;
server_name it.hopu.com;
index index.html index.htm index.php;
root html/bbs;
}</code></pre><h5 style="text-align: start; " id="heading-23"><strong>3.8 nginx的虚拟主机(基于IP)</strong></h5><pre><code>1、添加IP
[root@lnmp conf]# ifconfig ens33:1 192.168.1.15/24 ##临时添加个子接口IP
[root@lnmp conf]# ip add
lo: <LOOPBACK,UP,LOWER_UP> mtu 65536 qdisc noqueue state UNKNOWN group default qlen 1000
link/loopback 00:00:00:00:00:00 brd 00:00:00:00:00:00
inet 127.0.0.1/8 scope host lo
valid_lft forever preferred_lft forever
inet6 ::1/128 scope host
valid_lft forever preferred_lft forever
ens33: <BROADCAST,MULTICAST,UP,LOWER_UP> mtu 1500 qdisc pfifo_fast state UP group default qlen 1000
link/ether 00:0c:29:d9:4b:17 brd ff:ff:ff:ff:ff:ff
inet 192.168.1.10/24 brd 192.168.1.255 scope global noprefixroute ens33
valid_lft forever preferred_lft forever
inet 192.168.1.15/24 brd 192.168.1.255 scope global secondary ens33:1
valid_lft forever preferred_lft forever
inet6 fe80::f077:e3ce:7cf1:1ede/64 scope link noprefixroute
valid_lft forever preferred_lft forever
[root@lnmp conf]#
2、配置nginx配置文件
server {
listen 80;
server_name 192.168.1.10;
index index.html index.htm index.php;
root html/it;
}
server {
listen 80;
server_name 192.168.1.15;
index index.html index.htm index.php;
root html/bbs;
}
3、重启nginx进行测试</code></pre><p style="text-align: start; ">如果是基于IP地址访问的虚拟主机,则需要看include的位置,如果在server段之前,则优先匹配include里配置的虚拟主机,匹配的原则是“首字母越靠前,则会被优先匹配”;如果在server段之后,则优先匹配主配置文件中的虚拟主机。</p><h5 style="text-align: start; " id="heading-24"><strong>3.9 nginx实现 https</strong></h5><p style="text-align: start; ">a、安装 nginx时,需要将<code>--with-http_ssl_module</code>模块开启</p><p style="text-align: start; ">b、在对应要进行加密的 server标签中添加以下内容开启 SSL</p><pre><code>[root@lnmp/usr/local/nginx/conf/conf.d]$ cat it.myx.com.conf
server {
listen 80;
server_name it.myx.com;
index index.html index.htm index.php;
root html/it;
listen 443 ssl;
ssl_certificate /usr/local/nginx/conf/ssl/myx.crt;
ssl_certificate_key /usr/local/nginx/conf/ssl/myx.key;
ssl_session_timeout 5m;
ssl_protocols TLSv1 TLSv1.1 TLSv1.2;
ssl_prefer_server_ciphers on;
ssl_ciphers
"EECDH+CHACHA20:EECDH+CHACHA20-draft:EECDH+AES128:RSA+AES128:EECDH+AES256:RSA+AES256:EECDH+3DES:RSA+3DES:!MD5";
}</code></pre><p style="text-align: start; ">c、生成证书和秘钥文件</p><pre><code>建立服务器私钥,生成 RSA密钥
[root@lnmp/usr/local/nginx/conf/ssl]$ openssl genrsa -out myx.key 1024
Generating RSA private key, 1024 bit long modulus
.++++++
................++++++
e is 65537 (0x10001)</code></pre><pre><code>需要依次输入国家,地区,组织,email。最重要的是有一个 common name,可以写你的名字或者域
名。如果为了 https申请,这个必须和域名吻合,否则会引发浏览器警报。生成的 csr文件交给 CA签
名后形成服务端自己的证书
[root@lnmp/usr/local/nginx/conf/ssl]$ openssl req -new -key myx.key -out myx.csr
You are about to be asked to enter information that will be incorporated
into your certificate request.
What you are about to enter is what is called a Distinguished Name or a DN.
There are quite a few fields but you can leave some blank
For some fields there will be a default value,
If you enter '.', the field will be left blank.">[root@lnmp/usr/local/nginx/html]$ curl it.myx.com
it
[root@lnmp/usr/local/nginx/html]$ curl bbs.myx.com
bbse、访问测试
Windows Host解析文件:C:\Windows\System32\drivers\etc\hosts
# 添加
10.0.0.8 www.myx.com
10.0.0.8 www.it.com
3.7 nginx的虚拟主机(基于端口)
         server {
          listen 80;
           server_name it.hopu.com;
           index index.html index.htm index.php;
           root  html/it;
          }
        server {
           listen 81;
           server_name it.hopu.com;
           index index.html index.htm index.php;
           root  html/bbs;
       }
3.8 nginx的虚拟主机(基于IP)
1、添加IP
[root@lnmp conf]# ifconfig ens33:1 192.168.1.15/24 ##临时添加个子接口IP
[root@lnmp conf]# ip add
lo: <LOOPBACK,UP,LOWER_UP> mtu 65536 qdisc noqueue state UNKNOWN group default qlen 1000
link/loopback 00:00:00:00:00:00 brd 00:00:00:00:00:00
inet 127.0.0.1/8 scope host lo
valid_lft forever preferred_lft forever
inet6 ::1/128 scope host
valid_lft forever preferred_lft forever
ens33: <BROADCAST,MULTICAST,UP,LOWER_UP> mtu 1500 qdisc pfifo_fast state UP group default qlen 1000
link/ether 00:0c:29:d9:4b:17 brd ff:ff:ff:ff:ff:ff
inet 192.168.1.10/24 brd 192.168.1.255 scope global noprefixroute ens33
valid_lft forever preferred_lft forever
inet 192.168.1.15/24 brd 192.168.1.255 scope global secondary ens33:1
valid_lft forever preferred_lft forever
inet6 fe80::f077:e3ce:7cf1:1ede/64 scope link noprefixroute
valid_lft forever preferred_lft forever
[root@lnmp conf]#
2、配置nginx配置文件
server {
listen 80;
server_name 192.168.1.10;
index index.html index.htm index.php;
root html/it;
}
server {
listen 80;
server_name 192.168.1.15;
index index.html index.htm index.php;
root html/bbs;
}
3、重启nginx进行测试如果是基于IP地址访问的虚拟主机,则需要看include的位置,如果在server段之前,则优先匹配include里配置的虚拟主机,匹配的原则是“首字母越靠前,则会被优先匹配”;如果在server段之后,则优先匹配主配置文件中的虚拟主机。
3.9 nginx实现 https
a、安装 nginx时,需要将--with-http_ssl_module模块开启
b、在对应要进行加密的 server标签中添加以下内容开启 SSL
[root@lnmp/usr/local/nginx/conf/conf.d]$ cat it.myx.com.conf
server {
listen 80;
server_name it.myx.com;
index index.html index.htm index.php;
root  html/it;
listen 443 ssl;
ssl_certificate /usr/local/nginx/conf/ssl/myx.crt;
ssl_certificate_key /usr/local/nginx/conf/ssl/myx.key;
ssl_session_timeout 5m;
ssl_protocols TLSv1 TLSv1.1 TLSv1.2;
ssl_prefer_server_ciphers on;
ssl_ciphers
"EECDH+CHACHA20:EECDH+CHACHA20-draft:EECDH+AES128:RSA+AES128:EECDH+AES256:RSA+AES256:EECDH+3DES:RSA+3DES:!MD5";
}
c、生成证书和秘钥文件
建立服务器私钥,生成 RSA密钥
[root@lnmp/usr/local/nginx/conf/ssl]$ openssl genrsa -out myx.key 1024
Generating RSA private key, 1024 bit long modulus
.++++++
................++++++
e is 65537 (0x10001)
需要依次输入国家,地区,组织,email。最重要的是有一个 common name,可以写你的名字或者域
名。如果为了 https申请,这个必须和域名吻合,否则会引发浏览器警报。生成的 csr文件交给 CA签
名后形成服务端自己的证书
[root@lnmp/usr/local/nginx/conf/ssl]$ openssl req -new -key myx.key -out myx.csr
You are about to be asked to enter information that will be incorporated
into your certificate request.
What you are about to enter is what is called a Distinguished Name or a DN.
There are quite a few fields but you can leave some blank
For some fields there will be a default value,
If you enter '.', the field will be left blank.</h2>
<p>Country Name (2 letter code) [XX]:CN
State or Province Name (full name) []:HB
Locality Name (eg, city) [Default City]:WH
Organization Name (eg, company) [Default Company Ltd]:MYX
Organizational Unit Name (eg, section) []:MYX
Common Name (eg, your name or your server's hostname) []:it.myx.com # 这里的域名要和server段中的一致
Email Address []:myx@qq.com</p>
<p>Please enter the following 'extra' attributes
to be sent with your certificate request
A challenge password []:
An optional company name []:# 生成签字证书
[root@lnmp/usr/local/nginx/conf/ssl]$ openssl x509 -req -days 365 -sha256 -in myx.csr -signkey myx.key -out myx.crt
Signature ok
subject=/C=CN/ST=HB/L=WH/O=MYX/OU=MYX/CN=it.myx.com/emailAddress=myx@qq.com
Getting Private keyd、将证书复制到/usr/local/nginx/conf/ssl目录下
[root@localhost ssl]# ls
hopu.crt  hopu.csr  hopu.key
e、设置 http自动跳转 https功能
原有的 server标签修改监听端口
[root@lnmp/usr/local/nginx/conf/conf.d]$ vim server {
listen 443 ssl;
ssl_certificate /usr/local/nginx/conf/ssl/myx.crt;
ssl_certificate_key /usr/local/nginx/conf/ssl/myx.key;
ssl_session_timeout 5m;
ssl_protocols TLSv1 TLSv1.1 TLSv1.2;
ssl_prefer_server_ciphers on;
ssl_ciphers
"EECDH+CHACHA20:EECDH+CHACHA20-draft:EECDH+AES128:RSA+AES128:EECDH+AES256:RSA+AES256:EECDH+3DES:RSA+3DES:!MD5";
server_name it.myx.com;
index index.html index.htm index.php;
root  html/it;
}
[root@lnmp/usr/local/nginx/conf/conf.d]$ nginx -t
nginx: the configuration file /usr/local/nginx/conf/nginx.conf syntax is ok
nginx: configuration file /usr/local/nginx/conf/nginx.conf test is successful
f、重启nginx,访问测试

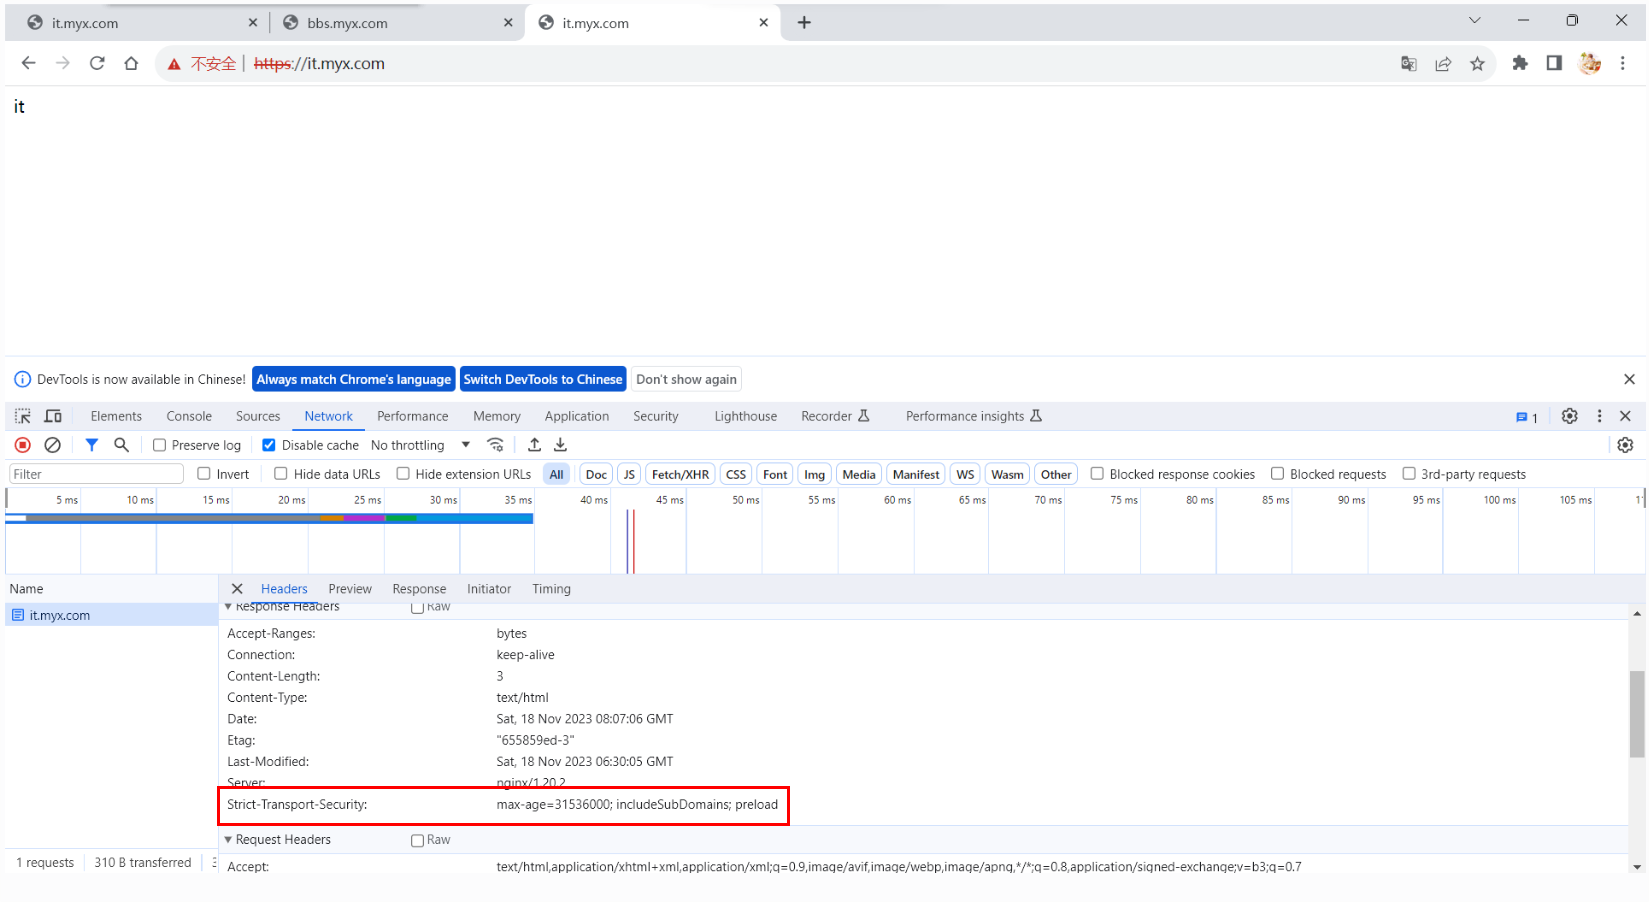
g、HSTS的实现
HSTS的全称是HTTP Strict-Transport-Security,它是一个Web安全策略机制(web security policy mechanism)。 HSTS最早于2015年被纳入到ThoughtWorks技术雷达,并且在2016年的最新一期技术雷达里,它直接从“评估(Trial)”阶段进入到了“采用(Adopt)“阶段,这意味着ThoughtWorks强烈主张业界积极采用这项安全防御措施,并ThoughtWorks已经将其应用于自己的项目。
HSTS最为核心的是一个HTTP响应头(HTTP Response Header)。正是它可以让浏览器得知,在接下来的一段时间内,当前域名只能通过HTTPS进行访问,并且在浏览器发现当前连接不安全的情况下,强制拒绝用户的后续访问要求。
在http段中加入下面的内容:
add_header Strict-Transport-Security "max-age=31536000; includeSubDomains; preload";重启Nginx服务,并使用https的方式访问网站:
3.10 nginx重写功能
3.10.1 rewrite
官方网站:https://nginx.org/en/docs/http/ngx_http_rewrite_module.html
http状态码:https://developer.mozilla.org/en-US/docs/Web/HTTP/Status
rewire规则也称为规则重写,主要功能是实现浏览器访问 Http Url的跳转,其正则达式是基于Perl语言。通常而言,几乎所有的Web服务器均可以支持URL重写,URL规则重写的用途如下:
1、对搜索引擎优化( search engine optimization,SEO)友好,利于搜索引擎抓取网站页面
2、隐藏网站URL真实地址,浏览器显示更加美观;
3、网站变更升级,可以基于 rewrite临时重定向到其他页面。
Nginx rewrite规则使用中有3个概念,分别是 rewrite结尾标识符、 rewrite规则常用表达式 ,Nginx rewrite变量,3个概念的详解如下:
(1) Nginx rewrite结尾标识符,用于 rewrite规则末尾,表示规则的执行属性详解
last:表示匹配本条规则后,继续向后匹配,浏览器地址栏URL地址不变。
break:本条规则匹配完成后,终止匹配,不再匹配后面的规则,浏览器地址栏URL地址不变。
redirect:返回302临时重定向,浏览器地址会显示跳转后的URL地址
permanent:返回301永久重定向,浏览器地址栏会显示跳转后的URL地址。
其中last和 break用来实现URL重写时,浏览器地址栏URL地址不变。
2) Nginx rewrite规则常用表达式,主要用于匹配参数、字符串及过滤设置,详解如下:
.:匹配任何单字符
[word:匹配字符串word
[^word:不匹配字符串word
?:匹配0个或者1个
<em>:匹配0个或者多个
+:匹配1个或者多个
^:字符串开头
$:字符串结尾
(3)Nginx rewrite变量,常用于匹配HTTP请求头信息、浏览器主机名、URL等,具体转义符标志内容如下
HTTP_USER_AGENT:用户使用的代理,例如浏览器。
Http_Referer:告知服务器,从哪个页面来访问的。
Http_Cookie:客户端缓存,主要用于存储用户名和密码等信息。
Http_Host:匹配服务器 servername域名。
Http_Accept:客户端的浏览器支持的MIME类型。
REMOTE_ADDR:客户端的IP地址。
QUERY_STRING:URL中访问的字符串。
DOCUMENT_ROOT:服务器发布目录。
SERVER_PORT:服务器端口
SERVER_PROTOCOL:服务器端协议。
TIME_YEAR:年。
TIME_MON:月。
TIME_DAY:日。注意:rewrite 只能在server {},location {},if {}中,并且默认只能对域名后边的除去传递的参数外的字符串起作用 例如:http://www.hopu.com/bbs/index.html?a=1&b=2只针对/abc/bbs/index.html重写
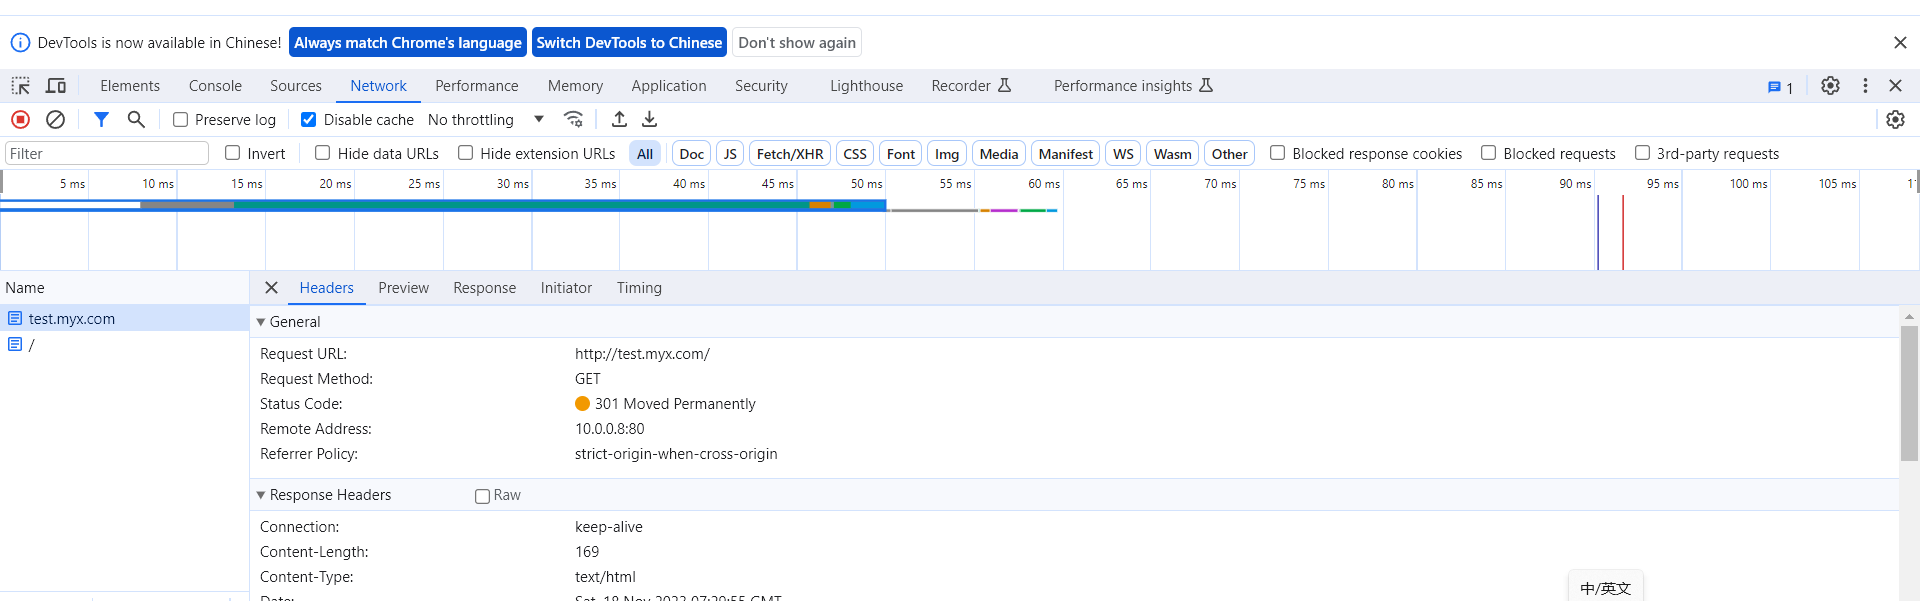
3.10.2 企业实战案例
案例1:公司网站升级了,原来使用的是test.myx.com网站,随着业务不断的发展,需要切换到新的域名上来
[root@lnmp/usr/local/nginx/conf/conf.d]$ vim test.myx.com.conf
server{
listen 80;
server_name test.myx.com;
rewrite ^(.</em>)$ https://it.myx.com/$1 permanent;
root html;
index index.html index.htm;
}
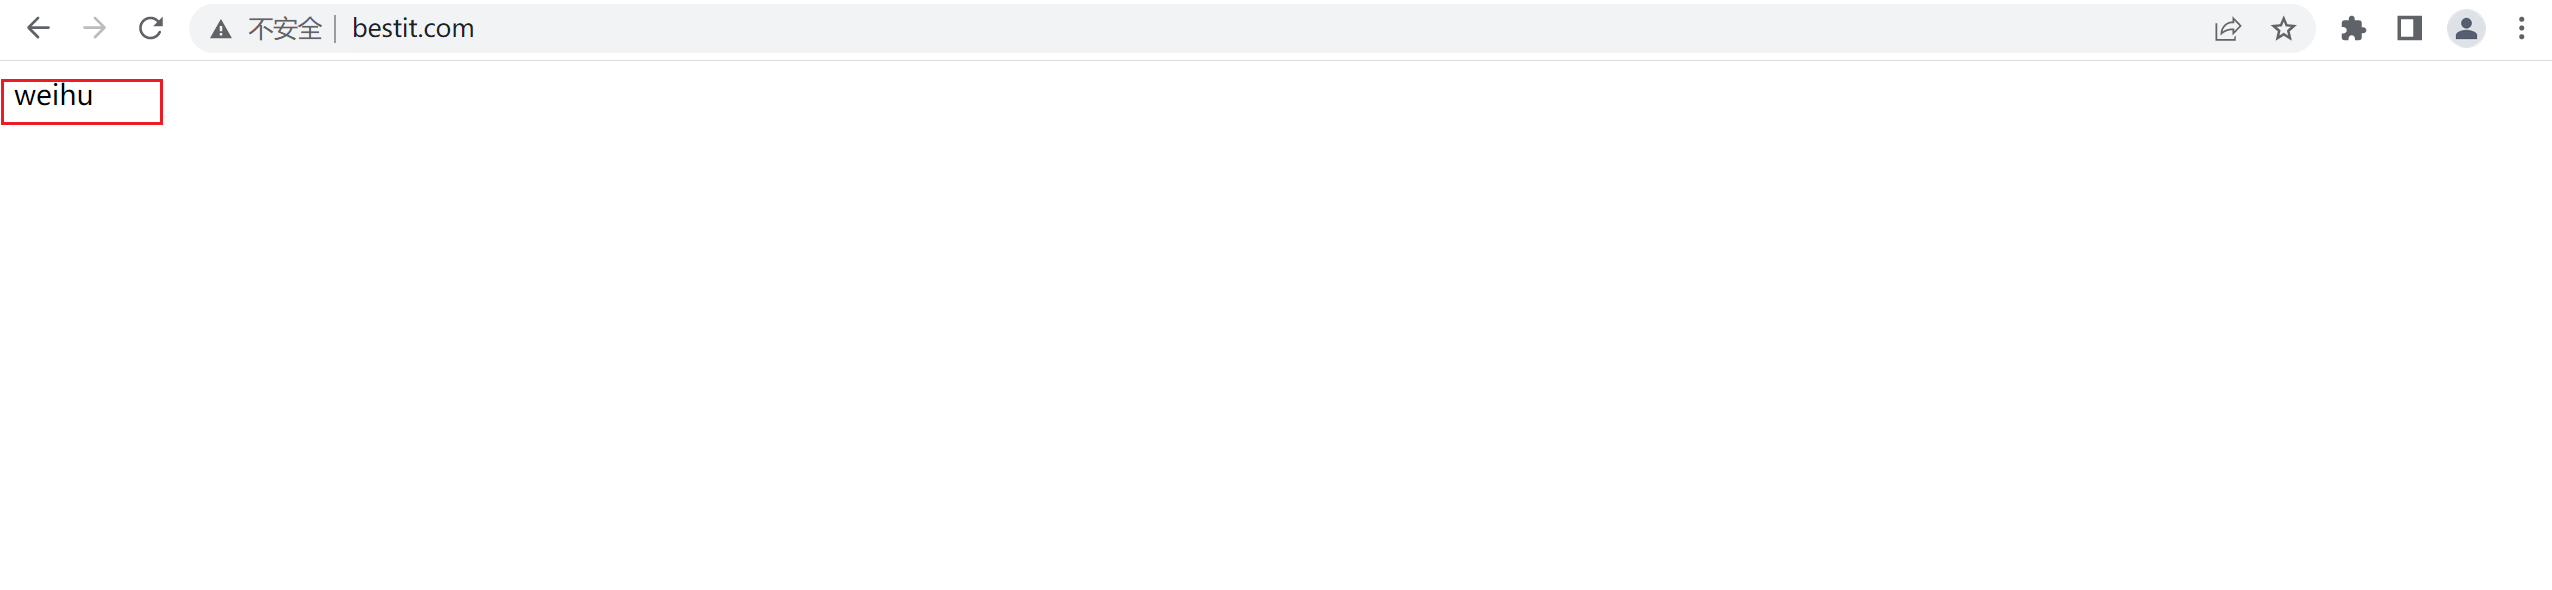
案例2:公司业务新版本上线,要求所有 IP 访问任何内容都显示是一个固定维护的页面,只有公司 IP 192.168.1.1 访问正常
server {
listen 80;
server_name www.bestit.com;
#charset koi8-r;
#access_log logs/host.access.log main;
##设置是否是合法的IP标记
set $rewrite true;
##设置变量$rewrite,变量值为boole值true
#判断是否为合法IP
if ($remote_addr = "192.168.1.1"){
set $rewrite false;
#当客户端IP为192.168.1.1时,将变量值设为flase,不进行重写
}
#除了合法IP,其它都是非法IP,进行重写跳转到维护页面
if ($rewrite = true) {
#当变量值为true时,进行重写
rewrite (.+) /weihu.html;
}
#重写在访问IP后边插入/weihu.html,例如192.168.1.120/weihu.html
location = /weihu.html {
#页面返回/usr/local/nginx/html/weihu.html的内容
root /usr/local/nginx/html;
}
location / {
root html;
index index.html index.htm;
}
}

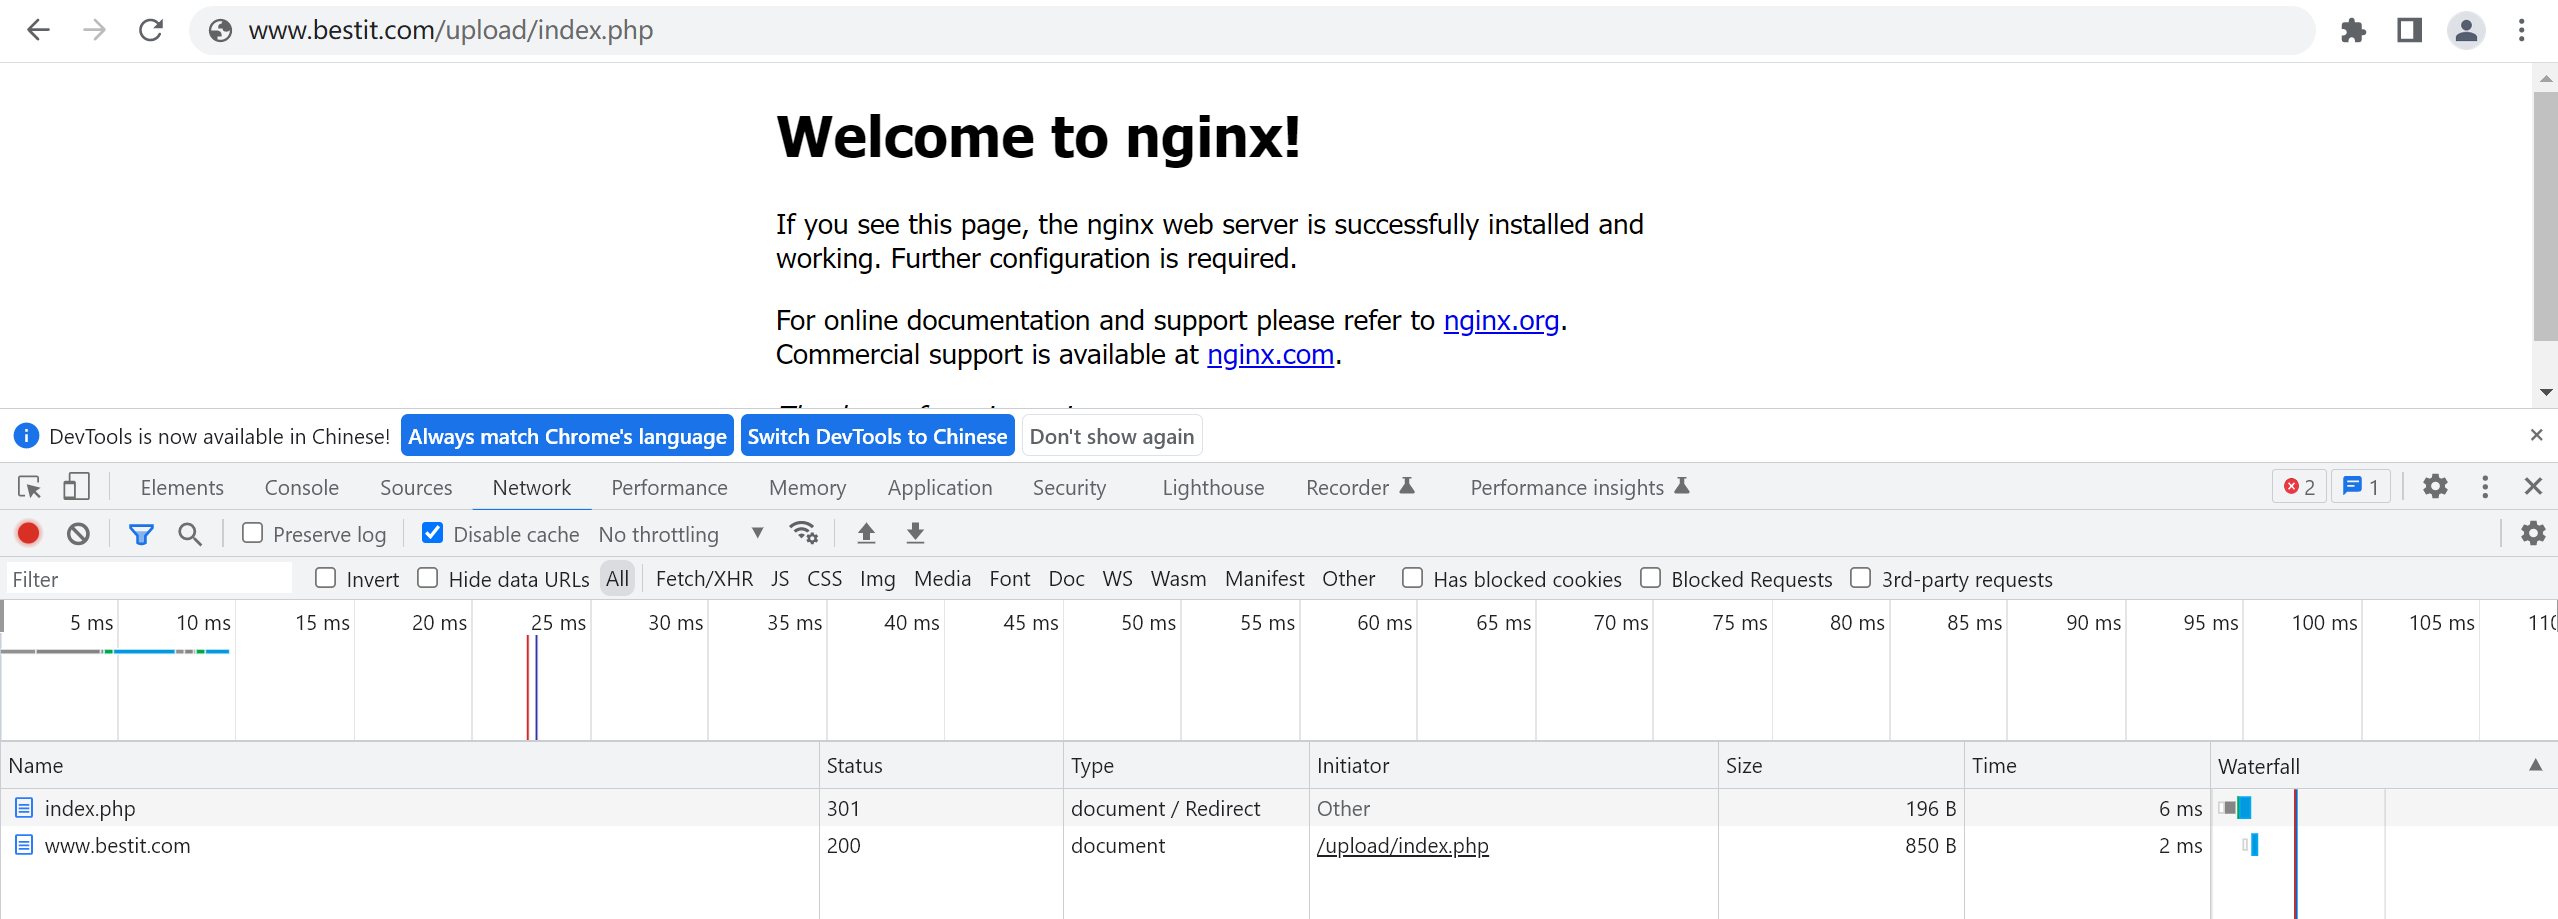
案例3:当访问www.bestit.com/upload/index.php的时候跳转到首页文件
server {
listen 80;
server_name www.bestit.com;
#charset koi8-r;
#access_log logs/host.access.log main;
location ~* /upload/.<em>.php$ {
rewrite (.+) http://www.bestit.com permanent;
}
location / {
root html;
index index.html index.htm;
}
}
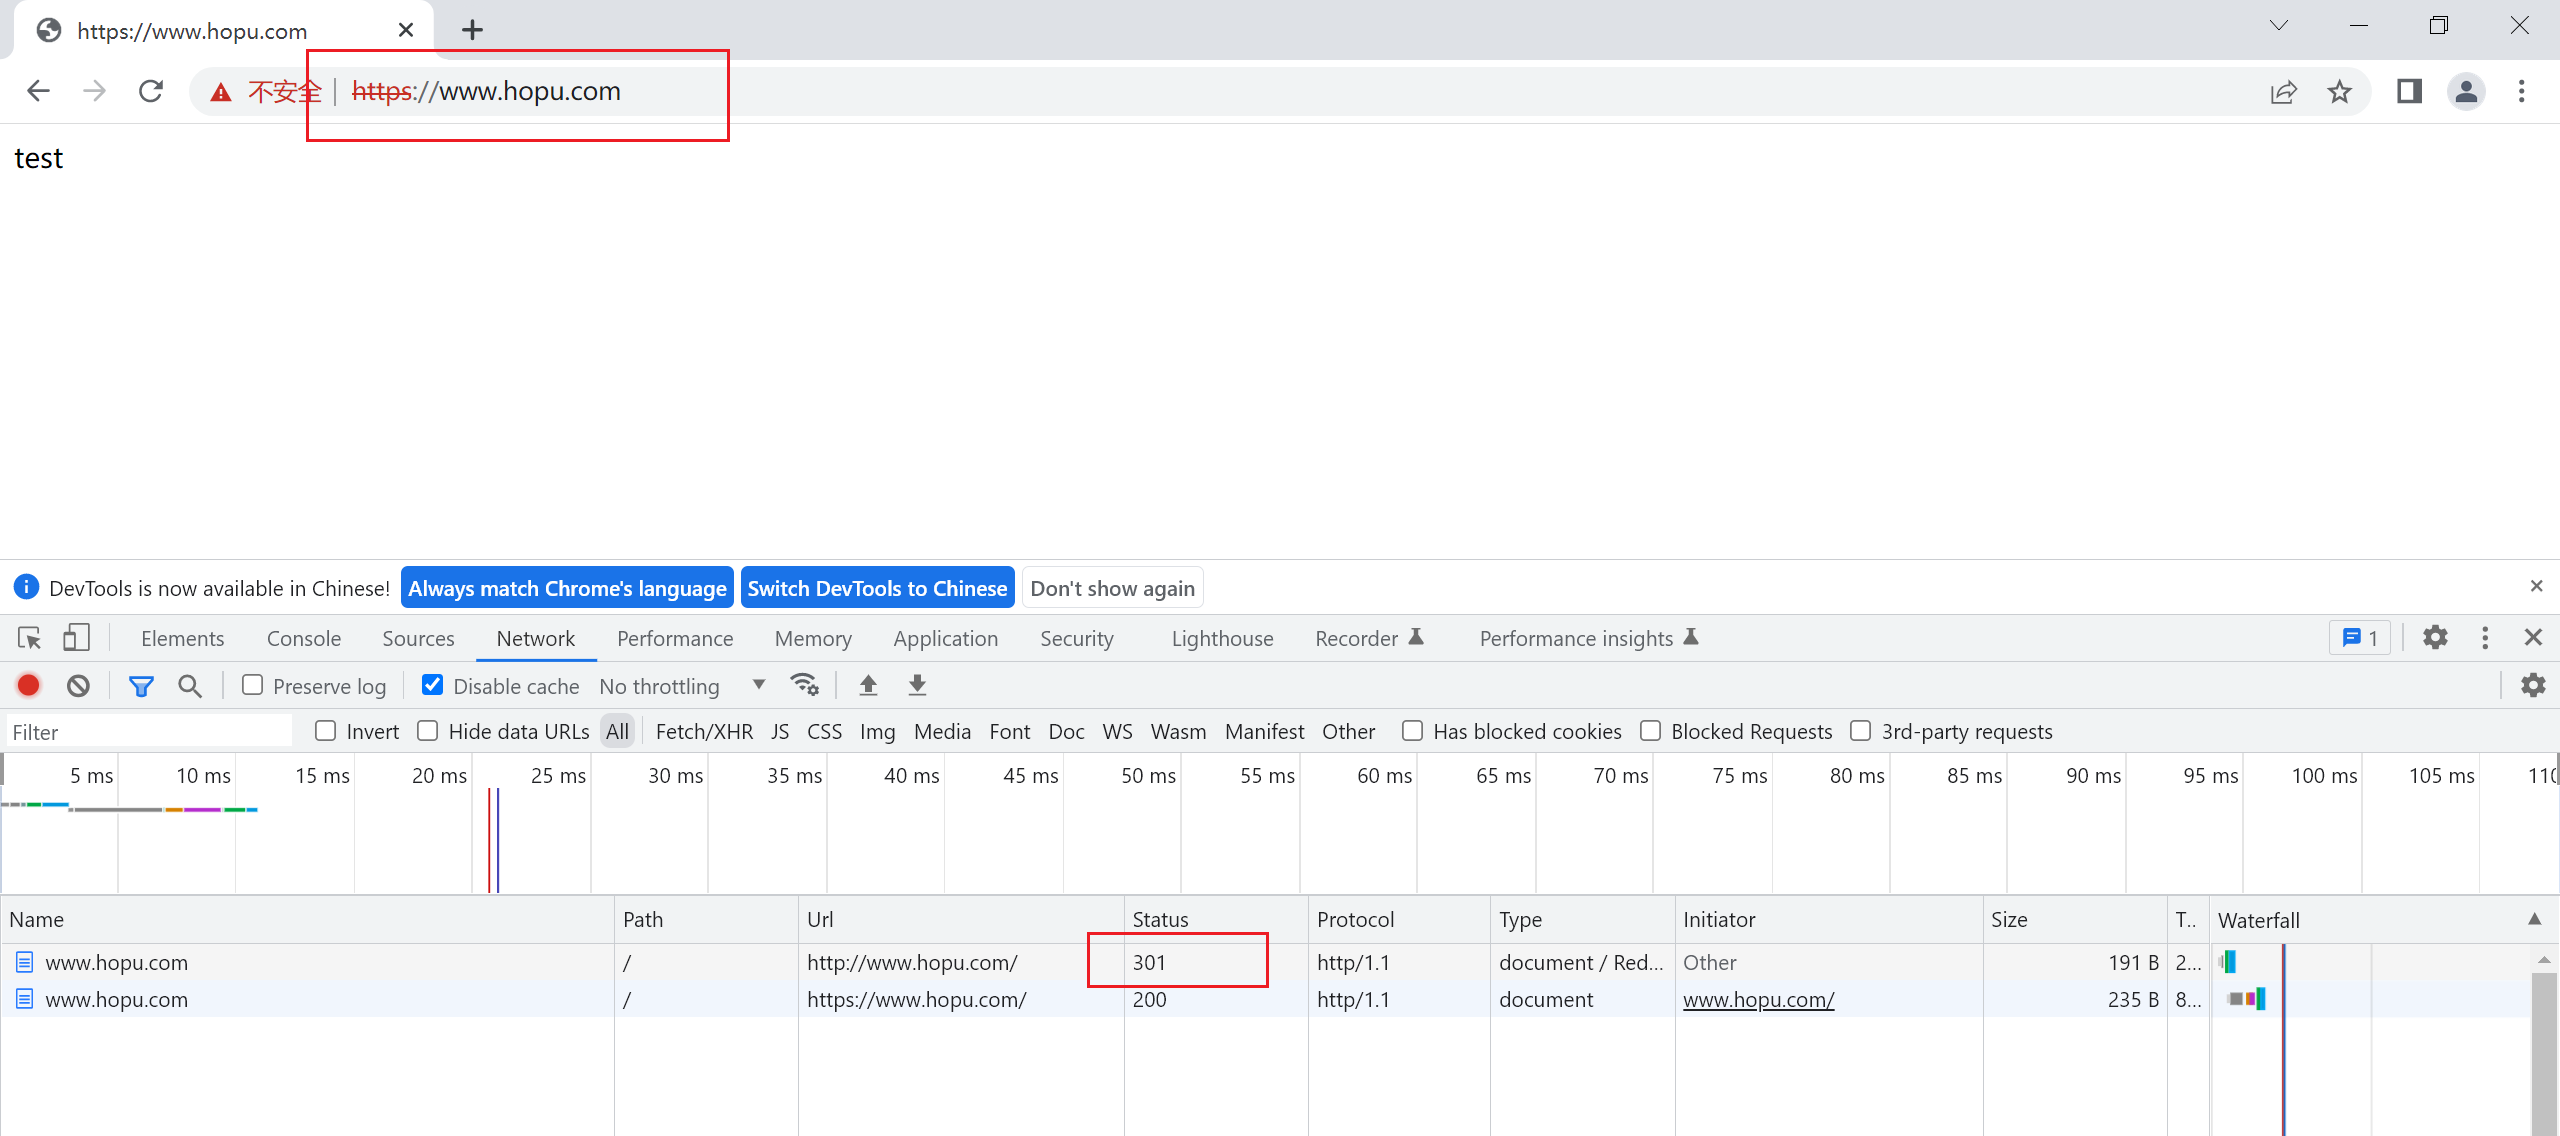
案例4:为了加强安全,公司新申请了SSL证书,需要绑定到公司的域名www.hopu.com上来,实现当用户访问http://www.hopu.com自动跳转到https://www.hopu.com站点上来
#HTTP段配置
server {
listen 80;
server_name www.hopu.com;
#charset koi8-r;
#access_log logs/host.access.log main;
##判断请求的架构如果是http,就开启重定向
if ( $scheme = http ) {
rewrite / https://www.hopu.com/$1 permanent;
}
location / {
root html;
index index.html index.htm;
}
}
#HTTPS段配置
server {
listen 443 ssl;
server_name www.hopu.com;
ssl_certificate /usr/local/nginx/ssl/hopu.crt;
ssl_certificate_key /usr/local/nginx/ssl/hopu.key;
ssl_session_timeout 5m;
ssl_protocols TLSv1 TLSv1.1 TLSv1.2;
ssl_prefer_server_ciphers on;
ssl_ciphers "EECDH+CHACHA20:EECDH+CHACHA20-draft:EECDH+AES128:RSA+AES128:EECDH+AES256:RSA+AES256:EECDH+3DES:RSA+3DES:!MD5";
}
案例5:伪静态配置
伪静态是相对真实静态来讲的,通常我们为了增强搜索引擎的友好面,都将文章内容生成静态页面,但是有的朋友为了实时的显示一些信息。或者还想运用动态脚本解决一些问题。不能用静态的方式来展示网站内容。但是这就损失了对搜索引擎的友好面。怎么样在两者之间找个中间方法呢,这就产生了伪静态技术。伪静态技术是指展示出来的是以html一类的静态页面形式,但其实是用ASP一类的动态脚本来处理的。
flag:last
     server {
        listen 80;
        server_name 192.168.1.10;
        root html;
        index index.html index.php;
    location / {
        rewrite /index.html /index.php last;     #last
            }
     location ~ .php$ {
           root           html;
           fastcgi_pass   127.0.0.1:9000;
           fastcgi_index  index.php;
           fastcgi_param  SCRIPT_FILENAME  /scripts$fastcgi_script_name;
           include        fastcgi.conf;
       }
     }
flag: break
     server {
        listen 80;
        server_name 192.168.1.10;
        root html;
        index index.html index.php;
    location / {
        rewrite /index.html /index.php break;    #break
          }
     location ~ .php$ {
           root           html;
           fastcgi_pass   127.0.0.1:9000;
           fastcgi_index  index.php;
           fastcgi_param  SCRIPT_FILENAME  /scripts$fastcgi_script_name;
           include        fastcgi.conf;
       }
     }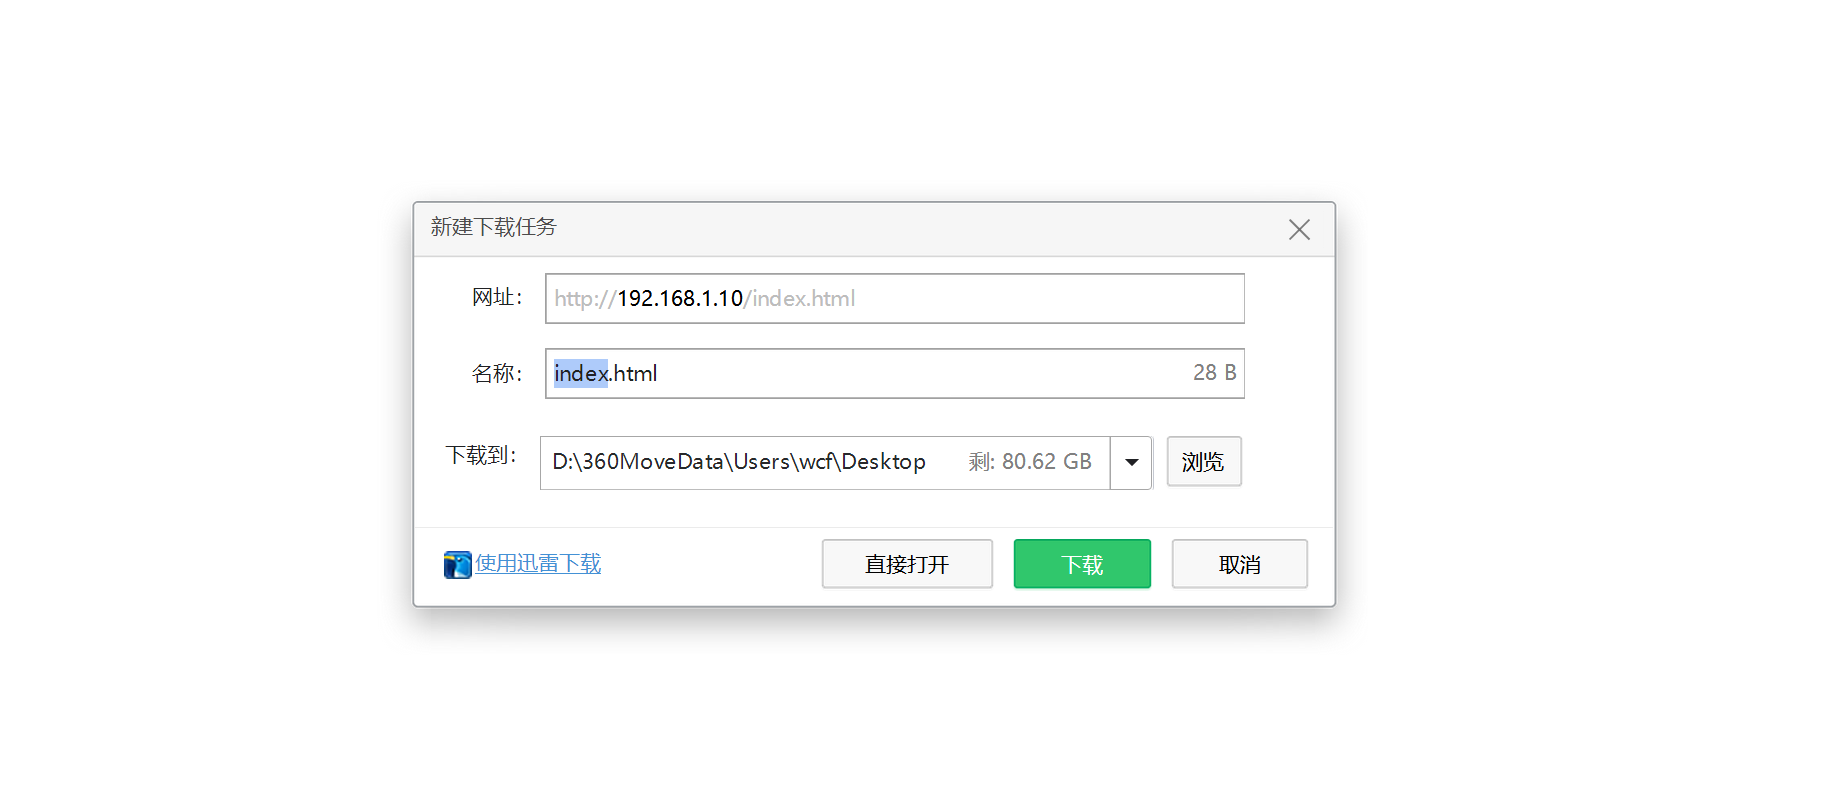
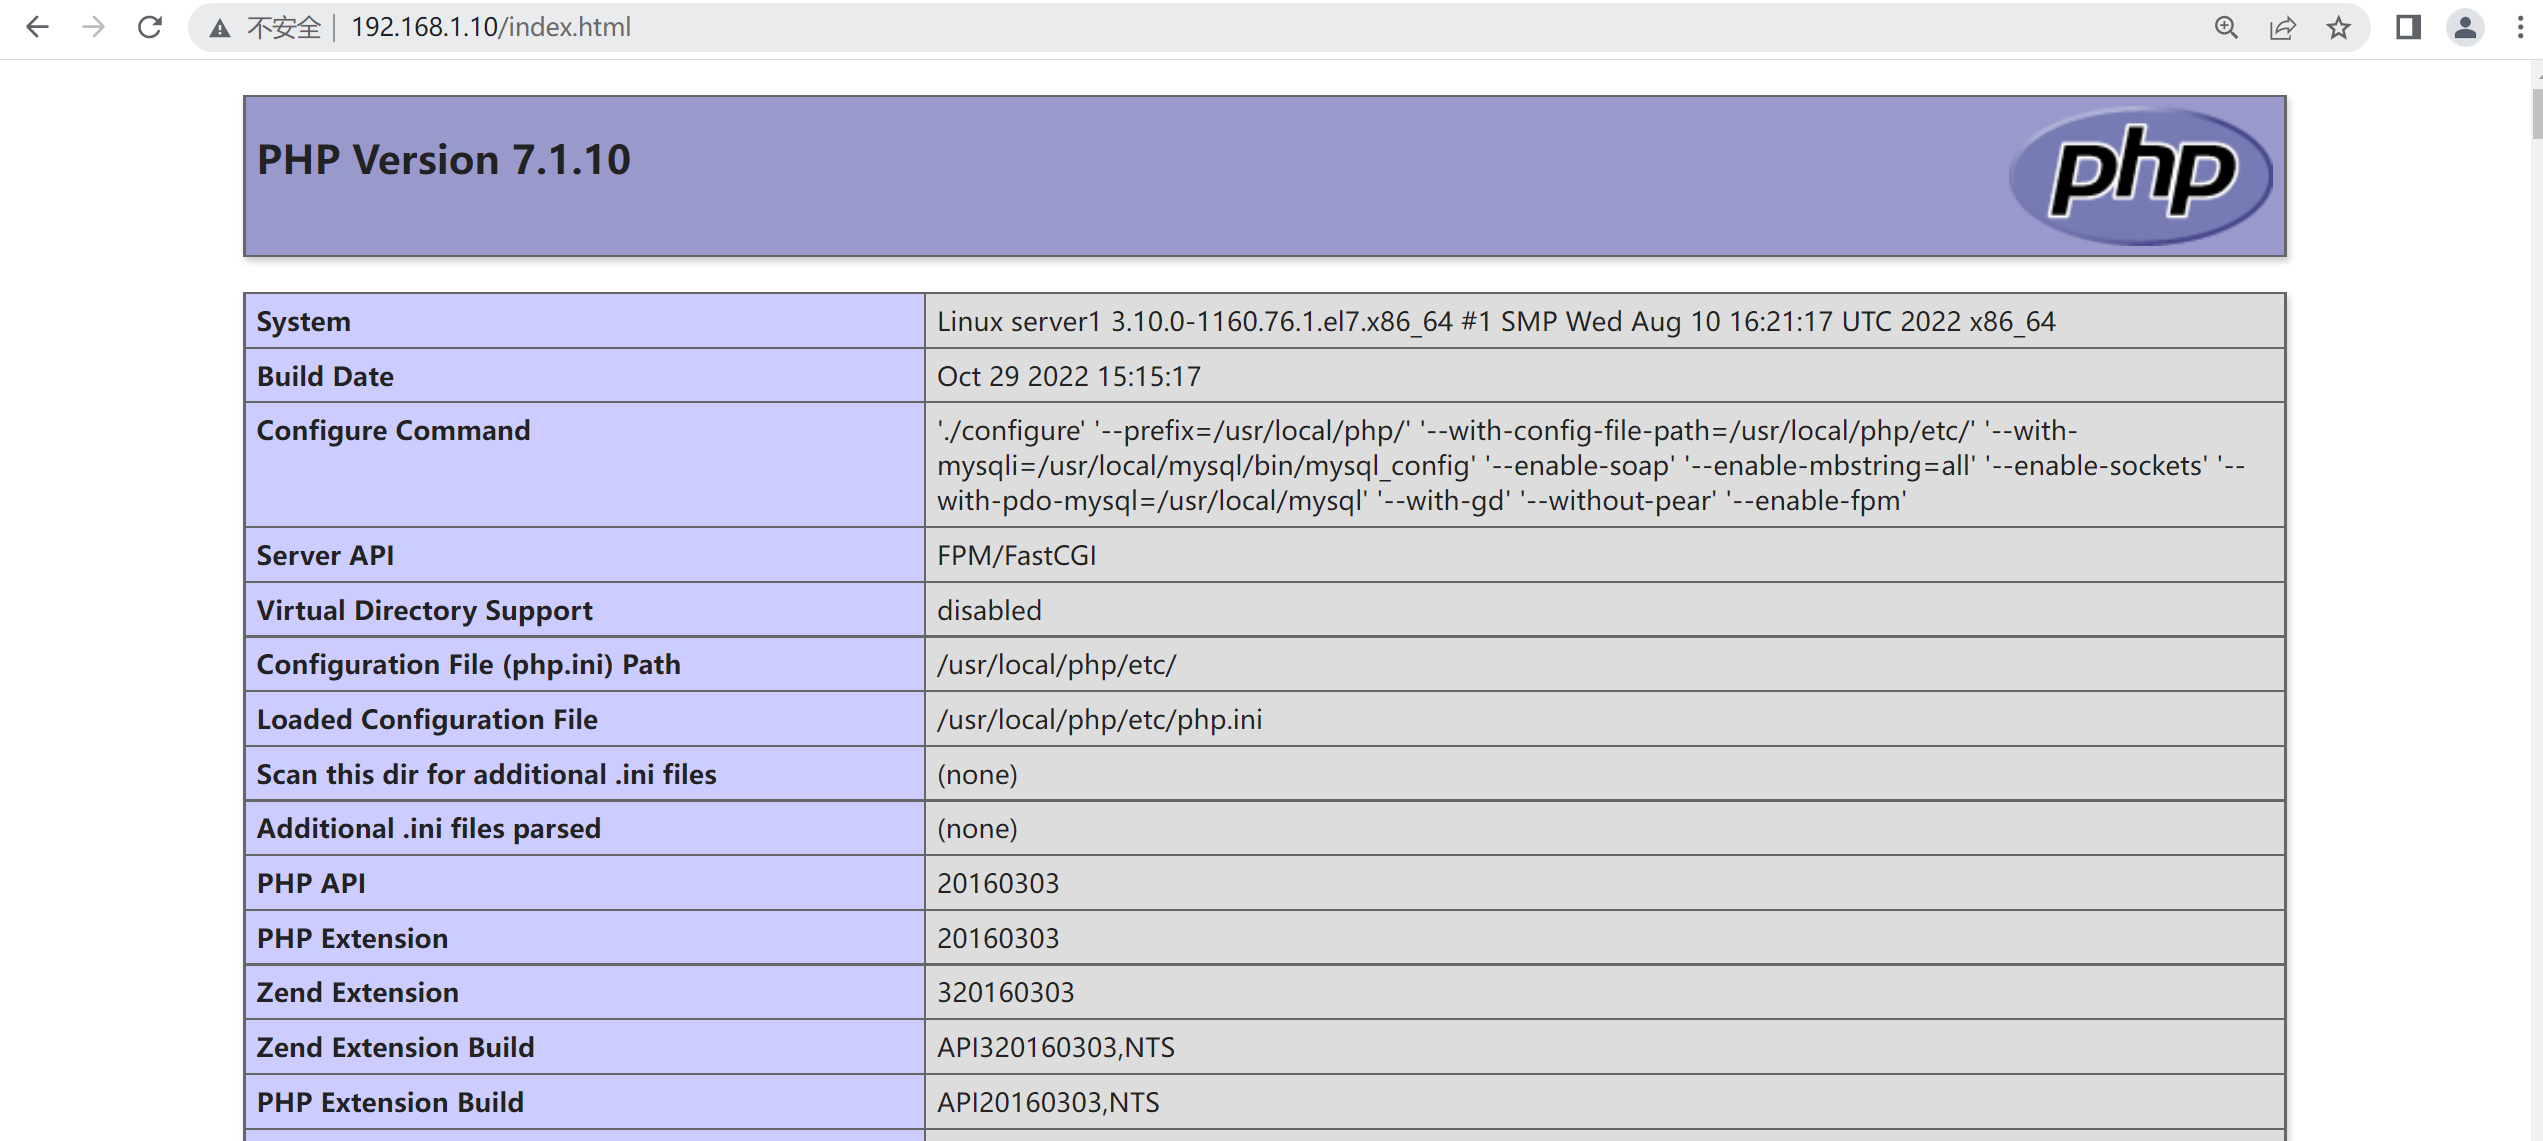
注意:last在匹配的时候并未结束,而是一直向后匹配,所以会通过php-fpm解析到了页面,但是break会停止解析,导致php的页面无法识别,而出现了下载的页面。
3.10.3 return
案例1:禁止访问以.sh,flv,.mp3等文件后缀名的文件
location ~ .</em>.(sh|flv|mp3)$
{
return 403;
}案例2:以 /index/ 开头的请求,如果链接的状态为 404。则会匹配到 @index_error 这条规则上
location /index/ {
      error_page 404 = @index_error;
      }
   location @index_error {
          default_type text/html;
          return 503;
}案例3:将http://www.hopu.com跳转到https://www.bestit.com
#HTTP段配置
server {
listen 80;
server_name www.hopu.com;
#charset koi8-r;
#access_log logs/host.access.log main;
return 301 https://www.hopu.com$request_uri;
location / {
root html;
index index.html index.htm;
}
}
#HTTPS段配置
server {
listen 443 ssl;
server_name www.hopu.com;
ssl_certificate /usr/local/nginx/ssl/hopu.crt;
ssl_certificate_key /usr/local/nginx/ssl/hopu.key;
ssl_session_timeout 5m;
ssl_protocols TLSv1 TLSv1.1 TLSv1.2;
ssl_prefer_server_ciphers on;
ssl_ciphers "EECDH+CHACHA20:EECDH+CHACHA20-draft:EECDH+AES128:RSA+AES128:EECDH+AES256:RSA+AES256:EECDH+3DES:RSA+3DES:!MD5";
}3.11 目录列表显示
官方网站:https://nginx.org/en/docs/http/ngx_http_autoindex_module.html
#可以配置在http,server,location段,推荐配置在location段
location /download {
autoindex on;
index index;
limit_rate 1024K;
autoindex_localtime on;
autoindex_exact_size on;
alias /data/download;
}
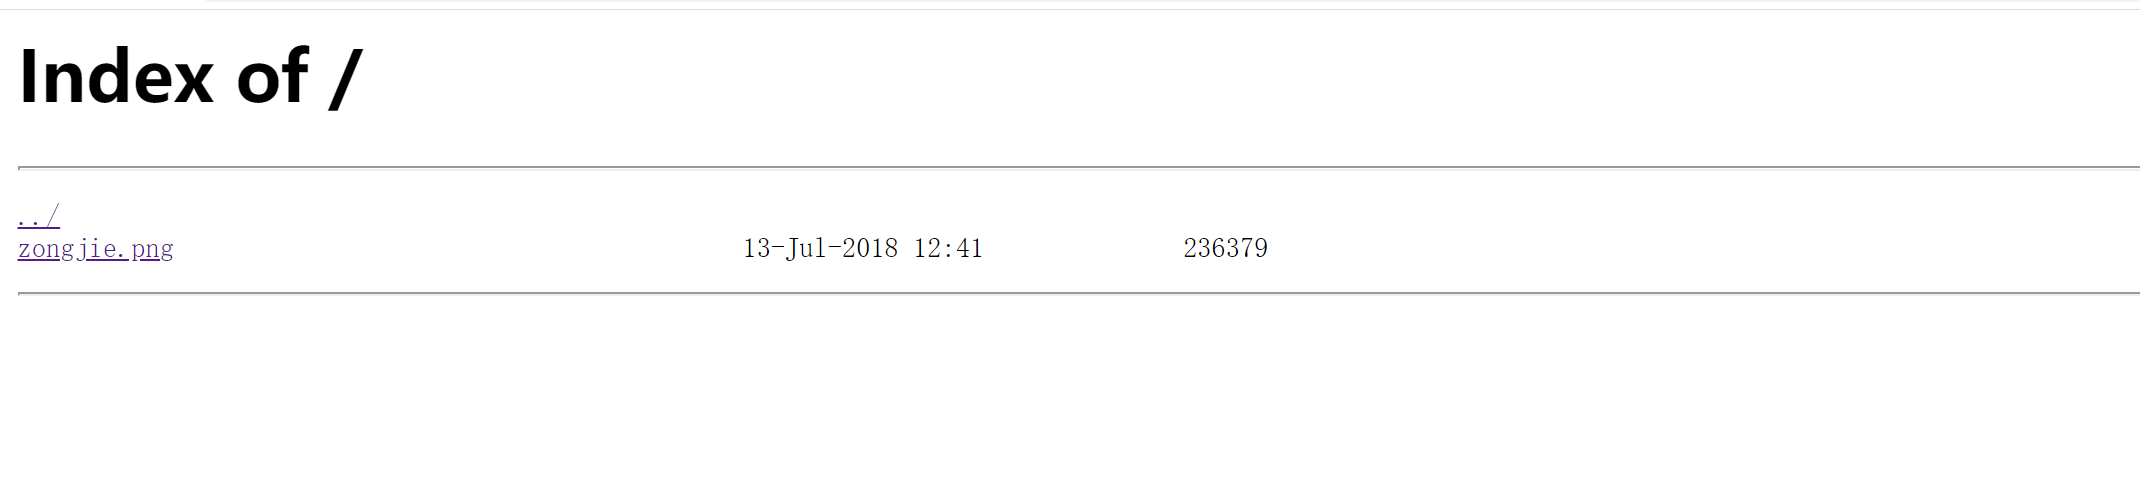
#注意:只有当目录列表中找不到文件时才会使用目录列表,如果index中没有文件,而又没有开启autoindex,则会报403帮助我们将网站文件列表显示
3.12 字符集设置
官方网站:https://nginx.org/en/docs/http/ngx_http_charset_module.html
默认nginx的字符集无法显示中文,因此会出现乱码,所以可以设置正确的字符集来显示中文
#可以配置在http,server,location段,推荐配置在http段
charset utf-8;
[root@localhost conf]# curl -I 192.168.1.10/index.php
HTTP/1.1 200 OK
Server: nginx/1.18.0
Date: Mon, 13 Nov 2023 12:29:32 GMT
Content-Type: text/plain; charset=utf-8
Content-Length: 22
Last-Modified: Mon, 13 Nov 2023 12:20:25 GMT
Connection: keep-alive
ETag: "65521489-16"
Accept-Ranges: bytes3.13 URI匹配之location
3.13.1 location的匹配规则
官方文档:https://nginx.org/en/docs/http/ngx_http_core_module.html#location
普通的匹配规则
规则表达式 | 规则含义 |
|---|---|
= | 进行普通字符精确匹配。也就是完全匹配 |
^~ | 表示普通字符匹配。使用前缀匹配。如果匹配成功,则不再匹配其他 location |
~ | 表示执行一个正则匹配,区分大小写 |
~ | 表示执行一个正则匹配,不区分大小写 |
!~ | 表示执行一个正则匹配,不匹配区分大小写 |
!~ | 表示执行一个正则匹配,不匹配不区分大小写 |
正则表达式规则
字符 | 含义 |
|---|---|
. | 匹配任意单个字符,可以是一个汉字 |
^ | 行首锚定,用于模式的最左侧 |
$ | 行尾锚定,用于模式的最右侧 |
? | 0 或 1 次 |
+ | 1 次或多次 (1 次或以上) |
</p> | 转义符 |
\d | 只匹配数字 |
{n} | 重复 n 次 |
{n,} | 至少 n 次 (n 次以上) |
{n,m} | n 到 m 次 |
[ ] | 定义匹配字符的范围,只匹配一次 |
[c] | 单个字符 |
[a-z] | 匹配任意小写字母 |
[a-zA-Z0-9] | 匹配任意字母和数字 |
() | 表达式的开始和结束位置 |
| | 或运算符 a|b |
location 语法规则
(=)的优先级最高。一旦匹配成功,则不再查找其他匹配项。
^~类型表达式。一旦匹配成功,则不再查找其他匹配项。
正则表达式类型(~和~<em>)的优先级次之。
常规字符串匹配类型(不带任何修饰符的匹配),按前缀匹配。/test
通用匹配(/),如果没有其它匹配,任何请求都会匹配到。3.13.2 location 配置案例
官方范例:
location = / {
[ configuration A ]
}
location / {
[ configuration B ]
}
location /documents/ {
[ configuration C ]
}
location ^~ /images/ {
[ configuration D ]
}
location ~</em> .(gif|jpg|jpeg)$ {
[ configuration E ]
}
he “/” request will match configuration A, the “/index.html” request will match configuration B(???????), the “/documents/document.html” request will match configuration C, the “/images/1.gif” request will match configuration D, and the “/documents/1.jpg” request will match configuration E=,精确匹配
server {
listen 80;
server_name www.bestit.com;
location / {
root /data/www;
index index.html index.htm;
}
location =/logo.png {
root /data/nginx/images;
index index.html index.htm;
}
}
#上传logo.png图片到/data/nginx/images,重启Nginx并访问测试
#访问测试: http://www.bestit.com/logo.png~,大小写敏感
location ~ /H.?.png {
index index.html index.htm;
root /data/nginx/html/images;
}
#上传上传HP.png图片到/data/nginx/html/images,重启Nginx并访问测试
#访问测试: http://www.bestit.com/Hp.png
#无法访问http://www.bestit.com/hp.png~,大小写忽略
  location ~</em> /H.?.png {
   index index.html index.htm;
   root /data/nginx/html/images;
}
#上传上传HP.png图片到/data/nginx/html/images,重启Nginx并访问测试
#访问测试: http://www.bestit.com/Hp.png [成功]
#无法访问http://www.bestit.com/hp.png [失败,网站根目录下没有hp.png图片]
4)^~,只匹配以 uri 开头
location ^~ /images/ {
root /data/nginx;
index index.html;
}
#以 /images/ 开头的请求,都会匹配上</p>
<h1 id="上传图片到/data/nginx/images/下,重启服务">上传图片到/data/nginx/images/下,重启服务</h1><h1 id="访问http://www.bestit.com/images/hp.png测试">访问http://www.bestit.com/images/hp.png测试</h1>
<p>
将内容修改成如下,访问hp.png,谁会被匹配到?
location ~* /.<em>.png {
index index.html index.htm;
root /data/nginx/html/images;
}
location ^~ /images/ {
root /data/nginx;
index index.html;
}/,其他匹配不成功,匹配此项
location / {
root /data/www;
index index.html index.htm;
}
#如果上述内容匹配不到,则进行改匹配如果匹配路径资源存在,则优先获取。
location匹配说明:
 1. 精确匹配:location = /  {.....}
2. 一般匹配:location  /  {.....}
3. 正则匹配:location ~ / {.....}
3.13.3 优先级匹配实例
location = /hp.png {
root /data/nginx/static1;
index index.html;
}
location /hp.png {
root /data/nginx/static2;
index index.html;
}
location ~</em> .(html|htm|gif|jpg|jpeg|bmp|png|ico|txt|js|css)$ {
root /data/nginx/static3;
index index.html;
}
}
</p>
<h1 id="将hp.png图片上传到/data/nginx/static{1..3}后,重启nginx测试">将hp.png图片上传到/data/nginx/static{1..3}后,重启nginx测试</h1>
<p>[root@localhost /]# mkdir /data/nginx/static{1..3}3.13.4 location匹配最佳实践
# 将静态资源文件进行请求路由
location ~ .*.(html|htm|gif|jpg|jpeg|bmp|png|ico|txt|js|css)$ {
root /data/webapps/www1;
expires 30d;
}</p>
<h1 id="将请求服务器接口的服务配置路由并反向代理">将请求服务器接口的服务配置路由并反向代理</h1>
<p>
location ~ .(php|jsp)$ {
proxy_set_header Host $host;
proxy_set_header X-Real-IP $remote_addr;
proxy_set_header X-Forwarded-For $proxy_add_x_forwarded_for;
proxy_pass http://jvm_web1; // 反向代理的请求地址
}3.14 自定义错误页面
自定义错误页面,自定义响应码进行响应
编辑 nginx.conf ,在你的 http 模块下的 server 模块中添加如下的 error_page 和 location
http {
# ...
server {
# ...
error_page 404 /error.html; # 将404错误页指向自定义的错误页面
#error_page 400 403 404 /error.html; # 你还可以这样写,让多个状态码指向同一个页面
# ...
location = /error.html {
root /path/to/your/html/files; # 指定你自定义错误页面所在的路径,即 error.html 所在的路径
}
}
}3.14.1 错误页面配置范例
server {
  listen 80;
  server_name www.bestit.com;
  error_page 404 /error.html;
location = /error.html {
   root /data/nginx/error;
    }
}
3.14.2 防止浏览器“劫持”页面
部分浏览器在访问到一些错误页面的时候,会进行页面内容的劫持,为了避免这个问题,可以做如下设置:
server {
listen 80;
server_name www.bestit.com;
error_page 404 =302 /error.html;
location = /error.html {
root /data/nginx/error;
}
}
#将访问错误的页面跳转到302重定向。
四、 Nginx日志管理
官方网站:https://nginx.org/en/docs/http/ngx_http_log_module.html
默认位置在nginx安装目录下的:logs/access.log,也可修改日志配置,在配置文件中:conf/nginx.conf
日志类型:
1)访问日志   access.log
2)错误日志   error.log
4.1 访问日志
4.1.1 查看访问日志
默认nginx的日志格式如下:
[root@lnmp logs]# cat access.log |head -n 1
192.168.1.1 - - [10/Oct/2022:14:00:18 +0800] "GET / HTTP/1.1" 200 612 "-" "Mozilla/5.0 (Windows NT 10.0; WOW64) AppleWebKit/537.36 (KHTML, like Gecko) Chrome/86.0.4240.198 Safari/537.36"
[root@lnmp logs]#
4.1.2 访问日志的格式说明
    #log_format  main  '$remote_addr - $remote_user [$time_local] "$request" '
   #                  '$status $body_bytes_sent "$http_referer" '
   #                  '"$http_user_agent" "$http_x_forwarded_for"';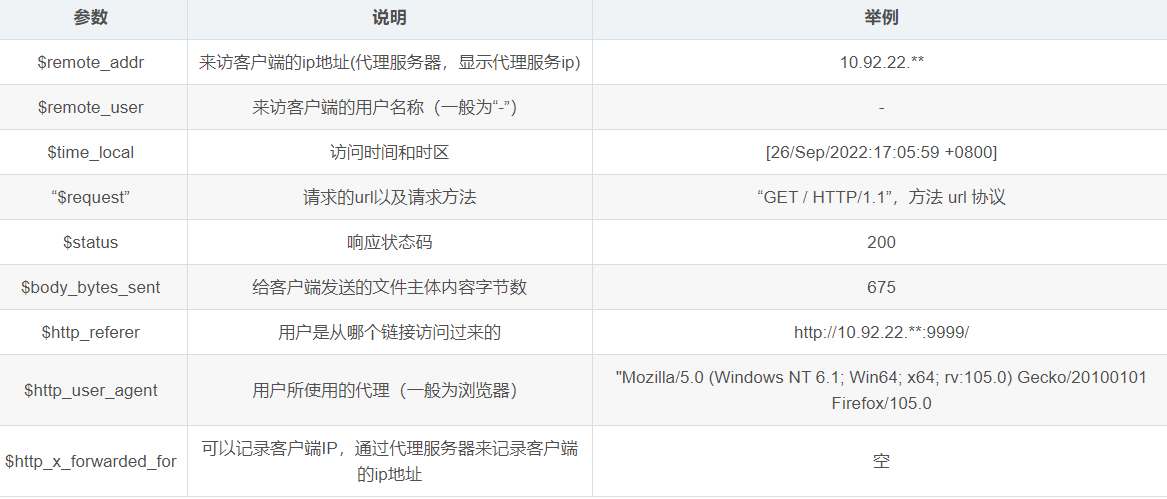
4.2 错误日志
官方网站:https://nginx.org/en/docs/ngx_core_module.html#error_log
主要记录一些启动和运行中的错误信息
开启错误日志   日志的位置      日志级别
#error_log  logs/error.log;
#error_log  logs/error.log  notice;
#error_log  logs/error.log  info;
4.2.1 查看错误日志
[root@lnmp logs]# cat error.log |tail -n 1
2022/9/29 21:09:44 [error] 2207#0: <em>1 directory index of "/usr/local/nginx/html/" is forbidden, client: 192.168.1.1, server: localhost, request: "GET / HTTP/1.1", host: "192.168.1.10"
4.3 自定义日志格式
自定义的格式必须要写在http段中
log_format   mylogs  '$remote_addr - $remote_user [$time_local] "$request" '
                     "$http_referer" "$http_user_agent" ;
引用日志格式,需要在server段中引用
access_log logs/local.access.log mylogs;[root@lnmp logs]# cat local.access.log
192.168.1.1 - - [19/Oct/2022:21:40:01 +0800] "GET / HTTP/1.1" -Mozilla/5.0 (Windows NT 10.0; Win64; x64) AppleWebKit/537.36 (KHTML, like Gecko) Chrome/106.0.0.0 Safari/537.364.4 日志切割参考脚本
#!/bin/bash
date=$(date +%F -d -1day)
cd /usr/local/nginx/logs
if [ ! -d cut ] ; then
 mkdir cut
fi
 mv access.log cut/access_$(date +%F -d -1day).log
 mv error.log cut/error_$(date +%F -d -1day).log
/usr/local/nginx/sbin/nginx -s reload
tar -jcvf cut/$date.tar.bz2 cut/</em>
rm -rf cut/access* && rm -rf cut/error*
 cat >>/var/spool/cron/root<<eof
 00 00 * * * /bin/sh /usr/local/nginx/logs/cut_nginx_log.sh >/dev/null 2>&1
eof
find -type f -mtime +10 | xargs rm -rf
五、Nginx使用扩展
5.1 安装第三方模块
第三方模块是指nginx官方没有的功能,开源社区的开发者定制开发的一些功能,可以通过编译加载第三方的模块的方式使用新的功能
5.1.1 安装第三方模块方法
./configure --prefix=/你的安装目录 --add-module=/第三方模块目录5.1.2 在nginx安装目录中创建文件夹third_moule。
下载模块到nginx安装目录中的third_module。
https://codeload.github.com/aperezdc/ngx-fancyindex/zip/master
https://github.com/openresty/echo-nginx-module/archive/v0.61.tar.gz
[root@lnmp nginx-1.20.2]# mkdir third_module5.1.3 解压模块
[root@lnmp third_module]# tar zxvf v0.61.tar.gz
[root@lnmp third_module]# unzip ngx-fancyindex-master.zip
5.1.4 安装第三方模块
进入到Nginx的安装目录下进行编译安装
[root@lnmp nginx-1.20.2]# ./configure --prefix=/usr/local/nginx --with-http_stub_status_module --with-http_ssl_module --with-http_v2_module --with-http_gunzip_module --with-http_sub_module --with-http_flv_module --with-http_mp4_module --with-pcre=/usr/local/src/pcre-8.41 --user=nginx --group=nginx --add-module=/usr/local/src/nginx-1.20.2/third_module/echo-nginx-module-0.61 --add-module=/usr/local/src/nginx-1.20.2/third_module/ngx-fancyindex-master[root@lnmp nginx-1.20.2]# make -j 8 && make -j 8 install && make -j 8 upgrade5.1.5 查看新的模块
可以进入到nginx的二进制安装路径下加-V查看
[root@lnmp sbin]# ./nginx -V
nginx version: bf/1.2.3
built by gcc 4.8.5 20150623 (Red Hat 4.8.5-44) (GCC)
built with OpenSSL 1.0.2k-fips 26 Jan 2017
TLS SNI support enabled
configure arguments: --prefix=/usr/local/nginx --with-http_stub_status_module --with-http_ssl_module --with-http_v2_module --with-http_gunzip_module --with-http_sub_module --with-http_flv_module --with-http_mp4_module --with-pcre=/usr/local/src/pcre-8.41 --user=nginx --group=nginx --add-module=/usr/local/src/nginx-1.20.2/third_module/echo-nginx-module-0.61 --add-module=/usr/local/src/nginx-1.20.2/third_module/ngx-fancyindex-master
5.2 使用第三方模块
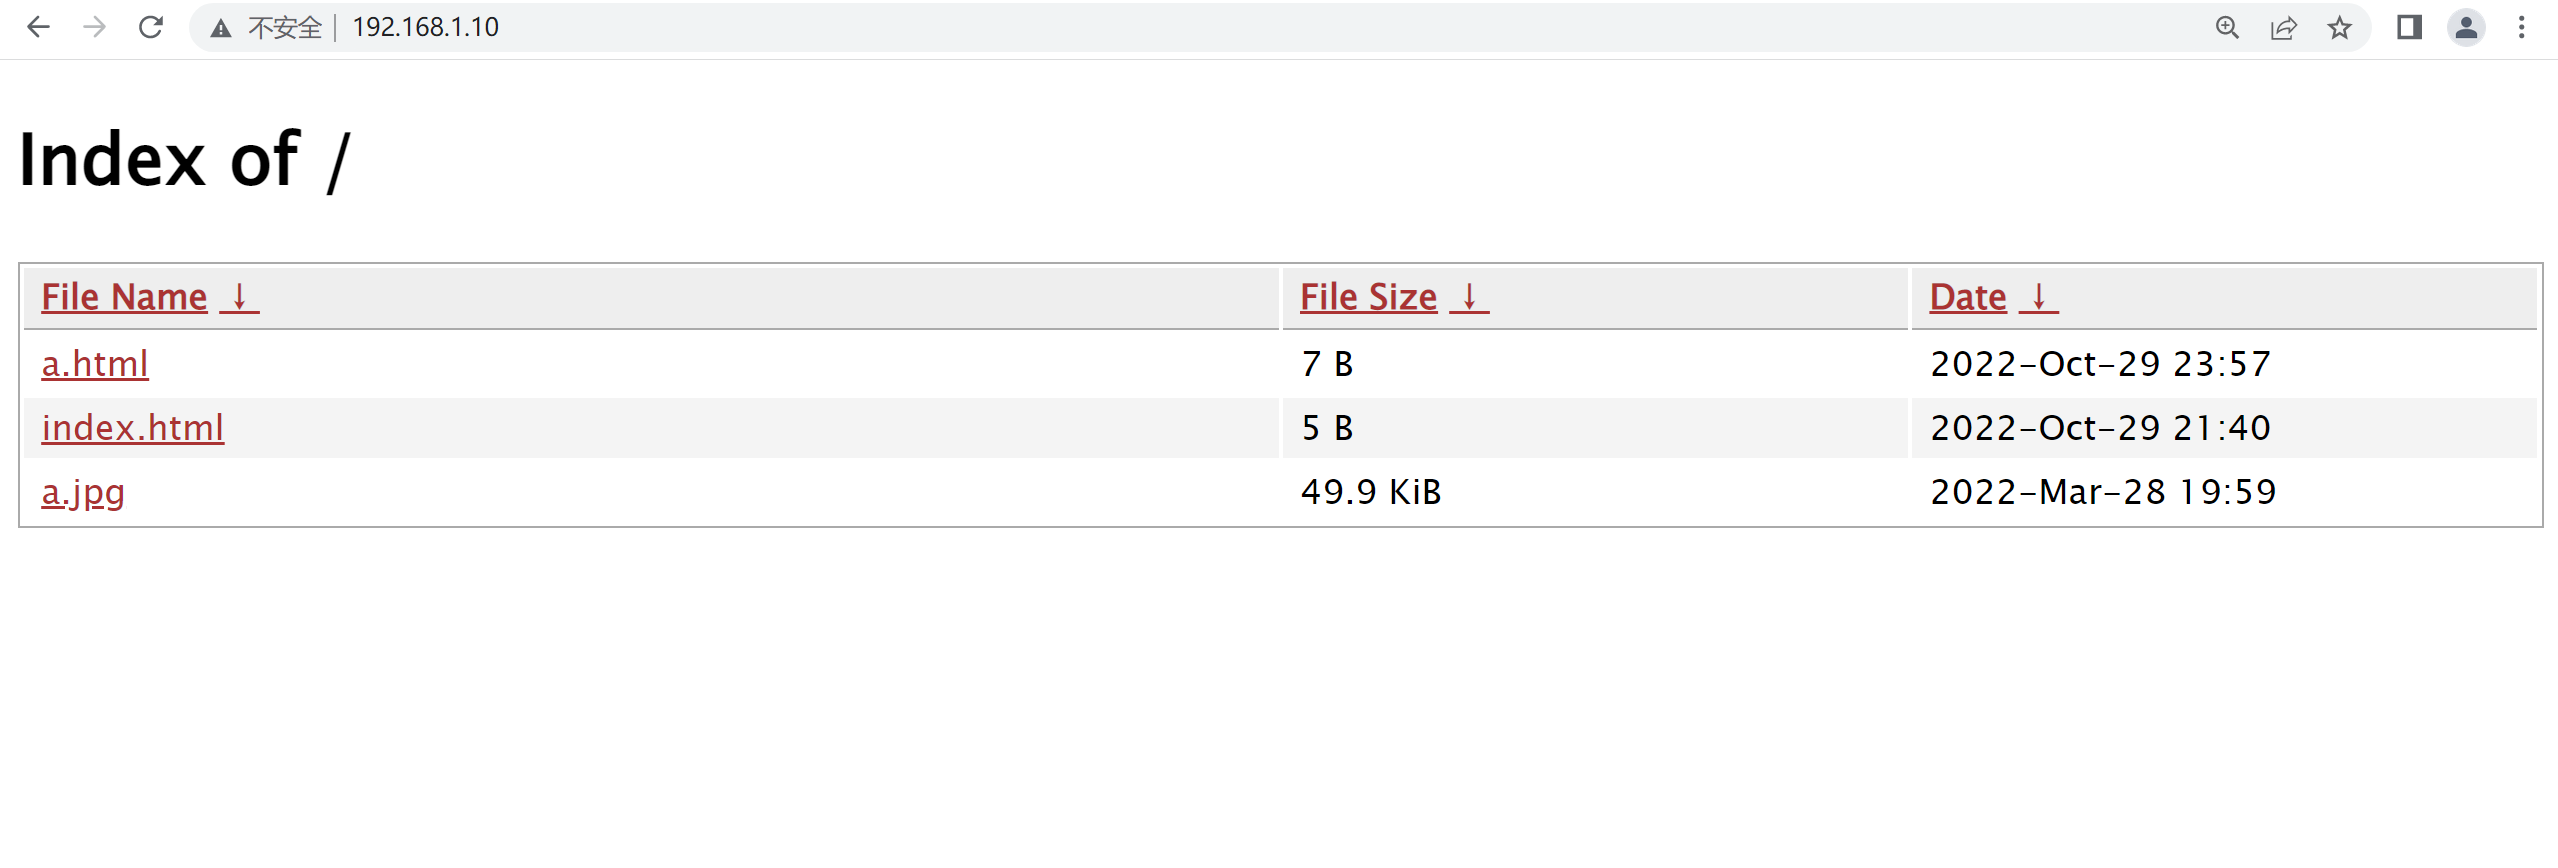
5.2.1 使用ngx-fancyindex模块实现目录列表优化显示
server {
listen 80;
server_name 192.168.1.10;
#加入如下几句:
fancyindex on;
fancyindex_localtime on; #on for local time zone. off for GMT
fancyindex_exact_size off; #off for human-readable. on for exact size in bytes
fancyindex_ignore "fancyindex"; #ignore this directory when showing list
fancyindex_default_sort date_desc; #以上传时间倒序排列
charset utf8;
root html;
index abc;
#access_log logs/host.access.log main;
error_page 500 502 503 504 /50x.html;
location = /50x.html {
root html;
}
}
5.2.2 使用echo模块
可以使用echo打印nginx的系统环境变量
https://nginx.org/en/docs/http/ngx_http_core_module.html#var_document_root
location {
#以文本的形式显示
default_type text/plain;
#打印根路径
echo $document_root;
}
location {
default_type text/html;
#输出html内容,需要使用text/html类型
echo <h1>hello hopu</h1>;
}location {
default_type text/html;
#输出html内容,需要使用text/html类型
echo $date_local;
echo $hostname;
}更多系统变量,请参考:https://nginx.org/en/docs/varindex.html
5.3 OpenResty
官方网站:http://openresty.org/cn/
OpenResty® 是一个基于 Nginx 与 Lua 的高性能 Web 平台,其内部集成了大量精良的 Lua 库、第三方模块以及大多数的依赖项。用于方便地搭建能够处理超高并发、扩展性极高的动态 Web 应用、Web 服务和动态网关,作者章亦春
5.3.1 安装openresty
安装方式有多种多样,适用于不同的操作系统平台,针对centos平台提供
1)yum 安装
2)源码编译安装
CentOS
你可以在你的 CentOS 系统中添加 openresty 仓库,这样就可以便于未来安装或更新我们的软件包(通过 yum check-update 命令)。 运行下面的命令就可以添加我们的仓库(对于 CentOS 8 或以上版本,应将下面的 yum 都替换成 dnf):
</p>
<h1 id="add the yum repo:">add the yum repo:</h1>
<p>wget https://openresty.org/package/centos/openresty.repo
sudo mv openresty.repo /etc/yum.repos.d/
</p>
<h1 id="update the yum index:">update the yum index:</h1>
<p>sudo yum check-update
然后就可以像下面这样安装软件包,比如 openresty:
sudo yum install -y openresty
如果你想安装命令行工具 resty,那么可以像下面这样安装 openresty-resty 包:
sudo yum install -y openresty-resty
命令行工具 opm 在 openresty-opm 包里,而 restydoc 工具在 openresty-doc 包里头。
列出所有 openresty 仓库里头的软件包:
sudo yum --disablerepo="*" --enablerepo="openresty" list available我们采取源码编译安装的方式安装:
下载地址:https://openresty.org/download/openresty-1.19.9.1.tar.gz
[root@lnmp ~]# tar -zxvf openresty-1.19.9.1.tar.gz -C /usr/local/src/
[root@lnmp openresty-1.19.9.1]# ./configure --prefix=/usr/local/openresty
[root@lnmp openresty-1.19.9.1]# ll /usr/bin/gmake
lrwxrwxrwx. 1 root root 4 Oct 29 13:16 /usr/bin/gmake -> make
[root@lnmp openresty-1.19.9.1]# make -j 8 && make -j 8 install
5.3.2 查看openresty的编译参数
[root@lnmp bin]# ./openresty -v
nginx version: openresty/1.19.9.1
[root@lnmp bin]# ./openresty -V
nginx version: openresty/1.19.9.1
built by gcc 4.8.5 20150623 (Red Hat 4.8.5-44) (GCC)
built with OpenSSL 1.0.2k-fips  26 Jan 2017
TLS SNI support enabled
configure arguments: --prefix=/usr/local/openresty/nginx --with-cc-opt=-O2 --add-module=../ngx_devel_kit-0.3.1 --add-module=../echo-nginx-module-0.62 --add-module=../xss-nginx-module-0.06 --add-module=../ngx_coolkit-0.2 --add-module=../set-misc-nginx-module-0.32 --add-module=../form-input-nginx-module-0.12 --add-module=../encrypted-session-nginx-module-0.08 --add-module=../srcache-nginx-module-0.32 --add-module=../ngx_lua-0.10.20 --add-module=../ngx_lua_upstream-0.07 --add-module=../headers-more-nginx-module-0.33 --add-module=../array-var-nginx-module-0.05 --add-module=../memc-nginx-module-0.19 --add-module=../redis2-nginx-module-0.15 --add-module=../redis-nginx-module-0.3.7 --add-module=../rds-json-nginx-module-0.15 --add-module=../rds-csv-nginx-module-0.09 --add-module=../ngx_stream_lua-0.0.10 --with-ld-opt=-Wl,-rpath,/usr/local/openresty/luajit/lib --with-stream --with-stream_ssl_module --with-stream_ssl_preread_module --with-http_ssl_module
5.3.3 启动openresty
[root@lnmp bin]# /usr/local/openresty/bin/openresty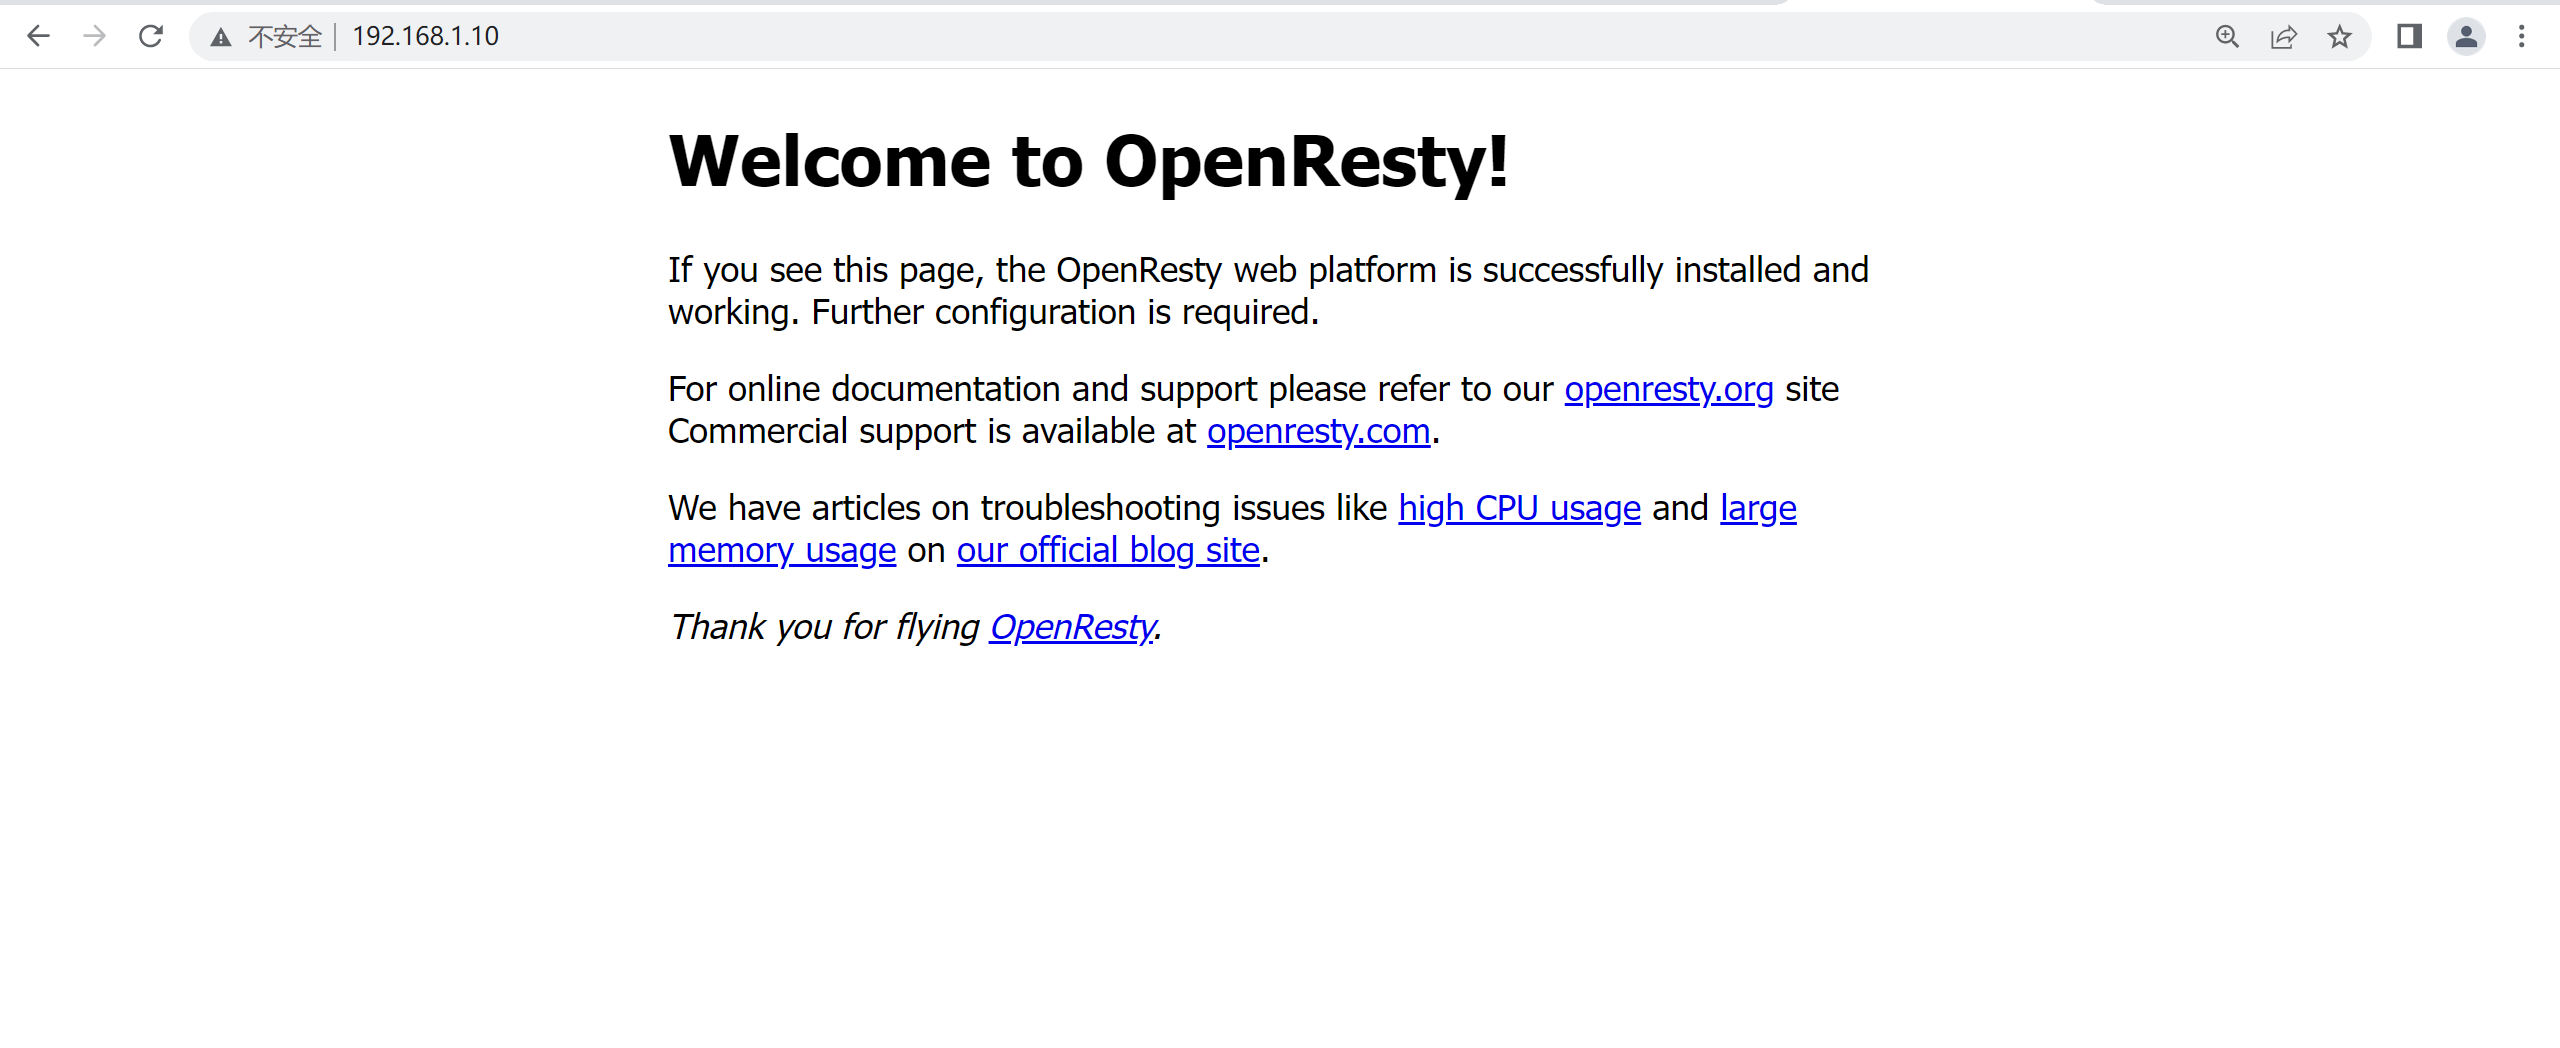
5.3.4 openresty的语法示例
        location / {
           default_type text/html;
           content_by_lua 'ngx.say("<p>Hello, World!</p>")';
       }
六、Nginx参数调优
6.1 隐藏nginx的版本
Nginx 编译前的优化 ,可以用于修改nginx的版本
[root@lnmp core]# pwd
/usr/local/src/nginx-1.20.2/src/core
[root@lnmp core]# vim src/core/nginx.h //目的更改源码隐藏软件名称和版本号
改:
13 #define NGINX_VERSION "1.12.2" #此行修改的是你想要的版本号
14 #define NGINX_VER "nginx/" NGINX_VERSION #此行修改的是你想修改的软件
名称
为:
13 #define NGINX_VERSION "8.8.2"
14 #define NGINX_VER "XWS/" NGINX_VERSION[root@lnmp core]# vim src/http/ngx_http_header_filter_module.c
改:49 static u_char ngx_http_server_string[] = "Server: nginx" CRLF; //修改 HTTP 头信
息中的 connection 字段,防止回显具体版本号
为:49 static u_char ngx_http_server_string[] = "Server: XWS" CRLF;完成后重新编译安装即可。
6.2 Nginx运行工作进程数量
Nginx运行工作进程个数一般设置CPU的核心或者核心数x2。如果不了解cpu的核数,可以top命令之后按1看出来,也可以查看/proc/cpuinfo文件 grep ^processor /proc/cpuinfo | wc -l
[root@localhost ~]# grep ^worker</usr/local/nginx/conf/nginx.conf
worker_processes  4;
[root@localhost ~]# nginx -s reload
[root@localhost ~]# ps -ef |grep nginx
root       1666      1  0 19:29 ?        00:00:00 nginx: master process nginx
nobody     1681   1666  0 19:30 ?        00:00:00 nginx: worker process
nobody     1682   1666  0 19:30 ?        00:00:00 nginx: worker process
nobody     1683   1666  0 19:30 ?        00:00:00 nginx: worker process
nobody     1684   1666  0 19:30 ?        00:00:00 nginx: worker process
root       1686   1633  0 19:30 pts/0    00:00:00 grep --color=auto nginx
[root@localhost ~]#
6.3 Nginx运行CPU亲和力
CPU的亲和性, 就是进程要在指定的 CPU 上尽量长时间地运行而不被迁移到其他处理器,也称为CPU关联性;再简单的点的描述就将制定的进程或线程绑定到相应的cpu上;在多核运行的机器上,每个CPU本身自己会有缓存,缓存着进程使用的信息,而进程可能会被OS调度到其他CPU上,如此,CPU cache命中率就低了,当绑定CPU后,程序就会一直在指定的cpu跑,不会由操作系统调度到其他CPU上,性能有一定的提高。比如4核配置:
worker_processes 4;
worker_cpu_affinity 0001 0010 0100 1000
比如8核配置:
worker_processes 8;
worker_cpu_affinity 00000001 00000010 00000100 0000100000010000 00100000 01000000 10000000;
worker_processes最多开启8个,8个以上性能提升不会再提升了,而且稳定性变得更低,所以8个进程够用了。
那么如果我是 4 线程的 CPU,我只想跑让vim命令运行在1号CPU上呢
语法: taskset -c N 命令[root@lnmp conf]# taskset -c 0 vim a.txt #1 号 CPU ID 是 0
[root@lnmp conf]# ps -ef |grep vim
root 2549 1177 0 23:06 pts/0 00:00:00 vim a.txt
root 2571 2553 0 23:07 pts/1 00:00:00 grep --color=auto vim
[root@lnmp conf]# taskset -p 2549
pid 2549's current affinity mask: 1 如果想查看ssh服务运行在哪个CPU核心上,可以如下查看方式:
[root@lnmp conf]# ps -ef |grep sshd
root        975      1  0 19:41 ?        00:00:00 /usr/sbin/sshd -D
root       1097    975  0 19:41 ?        00:00:03 sshd: root@pts/0
root       2232    975  0 21:35 ?        00:00:00 sshd: root@notty
root       2241    975  0 21:35 ?        00:00:00 sshd: root@notty
root       2551    975  0 23:06 ?        00:00:00 sshd: root@pts/1
root       2583   2553  0 23:09 pts/1    00:00:00 grep --color=auto sshd
[root@lnmp conf]# taskset -p 975
pid 975's current affinity mask: ff           #ff代表是8个核心,1个f代表是4个核心
例:指定 vim b.txt 程序运行在第 2 和第 4 个 CPU 上
[root@lnmp conf] taskset -c 1,3 vim b.txt
[root@lnmp conf] ps -axu | grep vim
Warning: bad syntax, perhaps a bogus '-'? See /usr/share/doc/procps-3.2.8/FAQ
root 6314 1.5 0.2 143612 3280 pts/1 S+ 14:41 0:00 vim b.txt
root 6317 0.0 0.0 103300 848 pts/2 S+ 14:41 0:00 grep vim
[root@lnmp conf] taskset -p 6314
pid 6314's current affinity mask: a</p>
<h1 id="a 为十进制的 10=2+8">a 为十进制的 10=2+8</h1>
<p>注:在哪个 CPU 上运行,那一位就赋为 1
关于换算方式:</p>
<p>8个核心的CPU ID: 7 6 5 4 3 2 1 0
对应10的十进制数位: 128 64 32 16 8 4 2 1
十六进制的16个数是:0、1、2、3、4、5、6、7、8、9、A、B、C、D、E、F</p>
<p>对应每一个16进制的二进制位:0=0000,1=0001,2=0010,3=0011,4=0100,5=0101,6=0110,7=0111,8=1000,9=1001,A=1010,
B=1011,C=1100,D=1101,E=1110,F=1111</p>
<p>那么例如出现pid 8987's current affinity mask: ff ff是16进制,转换二进制:11111111,意思就是sshd在8个CPU上进行却换!所以对应每一个数值!
比如说16进制的40,那么转换二进制01000000,意思就是在第7块CPU上运作6.4 Nginx最大打开文件数
worker_rlimit_nofile 65535;这个指令是指当一个nginx进程打开的最多文件描述符数目,理论值应该是最多打开文件数(ulimit -n)与nginx进程数相除,但是nginx分配请求并不是那么均匀,所以最好与ulimit -n的值保持一致。
注:文件资源限制的配置可以在/etc/security/limits.conf设置,针对root/user等各个用户或者代表所有用户来设置。
</em>   soft nofile   65535</p>
<ul>
<li>  hard nofile   65535
用户重新登录生效(ulimit -n)
6.5 进程优先级
官方文档:https://nginx.org/en/docs/ngx_core_module.html#worker_priority
worker_priority 20;[root@lnp conf]# watch -n2 'ps axo pid,cmd,psr,ni|grep nginx'6.6 Nginx事件处理模型
events {
use epoll;
worker_connections 65535;
multi_accept on;
}
nginx采用epoll事件模型,处理效率高。
work_connections是单个worker进程允许客户端最大连接数,这个数值一般根据服务器性能和内存来制定,实际最大值就是worker进程数乘以work_connections。
实际我们填入一个65535,足够了,这些都算并发值,一个网站的并发达到这么大的数量,也算一个大站了!
multi_accept 告诉nginx收到一个新连接通知后接受尽可能多的连接,默认是on,设置为on后,多个worker按串行方式来处理连接,也就是一个连接只有一个worker被唤醒,其他的处于休眠状态,设置为off后,多个worker按并行方式来处理连接,也就是一个连接会唤醒所有的worker,直到连接分配完毕,没有取得连接的继续休眠。当你的服务器连接数不多时,开启这个参数会让负载有一定的降低,但是当服务器的吞吐量很大时,为了效率,可以关闭这个参数。
扩展: select,poll,epoll 都是 IO 多路复用的机制。I/O 多路复用就通过一种机制,可以监视多个描述符,一旦某个描述符就绪(一般是读就绪或者写就绪),能够通知程序进行相应的读写操作。epoll 在 Linux2.6 内核中正式引入,和 select 相似其实都 I/O 多路复用技术。
epoll 优势:
1、epoll 没有最大并发连接的限制,上限是最大可以打开文件的数目,这个数字一般远大于 2048, 一般来说这个数目和系统内存关系很大,具体数目可以 cat /proc/sys/fs/file-max查看。
[root@lnmp http]# cat /proc/sys/fs/file-max
179482
2、 效率提升,epoll 最大的优点就在于它只管你“活跃”的连接,而跟连接总数无关,因此在实际的网络环境中,epoll 的效率就会远远高于 select 和 poll。
3、 内存拷贝,epoll 在这点上使用了“共享内存”,这个内存拷贝也省略了 6.7 开启高效传输模式
 Include mime.types;                                          媒体类型
default_type application/octet-stream;                       默认媒体类型 足够
sendfile on;                                                 开启高效文件传输模式,sendfile 指令指定 nginx 是否调用,  sendfile 函数来输出文件,对于普通应用设为 on,如果用来进行下载等应用磁盘 IO 重负载应用,可设置为 off,以平衡磁盘与网络 I/O 处理速度,降低系统的负载。注意:如果图片显示不正常把这个改成 off。
tcp_nopush on;                                                必须在 sendfile 开启模式才有效,防止网络阻塞,积极的减少网络报文段的数量
6.8 连接超时时间
主要目的是保护服务器资源,CPU,内存,控制连接数,因为建立连接也是需要消耗资源的,TCP 的三次握手四次挥手等,我们一般断掉的是那些建立连接但是不做事儿,也就是我建立了链接开始,但是后续的握手过程没有进行,那么我们的链接处于等待状态的,全部断掉!同时我们也希望 php 建议短链接,消耗资源少
keepalive_timeout 60 65;
client_header_timeout 15;
client_body_timeout 15;
send_timeout 15;
keepalived_timeout 客户端连接保持会话超时时间,超过这个时间,服务器断开这个链接
client_header_timeout 客户端请求头读取超时时间,如果超过设个时间没有发送任何数据,nginx将返回 request time out 的错误
client_body_timeout 客户端请求主体超时时间,超过这个时间没有发送任何数据,和上面一样的错误提示
send_timeout 响应客户端超时时间,这个超时时间仅限于两个活动之间的时间,如果超过这个时间,客户端没有任何活动,nginx 关闭连接6.9 文件上传大小限制
我们知道 PHP 可以修改上传文件大小限制,nginx 也可以修改,默认大小是1M,超过此大小会报413的错误,阿里云的虚拟主机的文件上传功能就是使用此功能实现。
http {
client_max_body_size 10m;
}
6.10 Fastcgi 调优
Nginx 没有配置 factcgi,你使用 nginx 是一个失败的方法,配置之前。了解几个概念:
Cache:写入缓存区
Buffer:读取缓存区
Fastcgi 是静态服务和动态服务的一个接口
fastcgi_connect_timeout 300; #指定链接到后端 FastCGI 的超时时间。
fastcgi_send_timeout 300; #向 FastCGI 传送请求的超时时间,这个值是指已经完成两次握手后向 FastCGI 传送请求的超时时间。
fastcgi_read_timeout 300; #指定接收 FastCGI 应答的超时时间,这个值是指已经完成两次握手后接收 FastCGI 应答的超时时间。
fastcgi_buffer_size 64k; #指定读取 FastCGI 应答第一部分需要用多大的缓冲区,这个值表示将使用 1 个 64KB 的缓冲区读取应答的第一部分(应答头),可以设置为 fastcgi_buffers 选项指定的缓冲区大小。
fastcgi_buffers 4 64k; #指定本地需要用多少和多大的缓冲区来缓冲 FastCGI 的应答请求,如果一个 php 脚本所产生的页面大小为 256KB,那么会分配 4 个 64KB 的缓冲区来缓存,如果页面大小大于256KB,那么大于 256KB 的部分会缓存到 fastcgi_temp 指定的路径中,但是这并不是好方法,因为内存中的数据处理速度要快于磁盘。一般这个值应该为站点中 php 脚本所产生的页面大小的中间值,如果站点大部分脚本所产生的页面大小为 256KB,那么可以把这个值设置为“8 16K”、“4 64k”等。
fastcgi_busy_buffers_size 128k; #建议设置为 fastcgi_buffer 的两倍,繁忙时候的
bufferfastcgi_temp_file_write_size 128k; #在写入 fastcgi_temp_path 时将用多大的数据库,默认值
是 fastcgi_buffers 的两倍,设置上述数值设置小时若负载上来时可能报 502Bad Gateway
fastcgi_cache gnix; #表示开启 FastCGI 缓存并为其指定一个名称。开启缓存非常有用,可以有效降低 CPU 的负载,并且防止 502 的错误发生,但是开启缓存也可能会引起其他问题,要很据具体情况选择fastcgi_cache_valid 200 302 1h; #用来指定应答代码的缓存时间,实例中的值表示将 200 和 302应答缓存一小时,要和 fastcgi_cache 配合使用
fastcgi_cache_valid 301 1d; #将 301 应答缓存一天
fastcgi_cache_valid any 1m; #将其他应答缓存为 1 分钟
fastcgi_cache_min_uses 1; #请求的数量
fastcgi_cache_path #定义缓存的路径修改 nginx.conf 配置文件,在 http 标签中添加如下:
fastcgi_connect_timeout 300;
fastcgi_send_timeout 300;
fastcgi_read_timeout 300;
fastcgi_buffer_size 64k;
fastcgi_buffers 4 64k;
fastcgi_busy_buffers_size 128k;
fastcgi_temp_file_write_size 128k;
#fastcgi_temp_path /data/ngx_fcgi_tmp;
fastcgi_cache_path /data/ngx_fcgi_cache levels=2:2 #缓存路径,levels 目录层次 2 级
keys_zone=ngx_fcgi_cache:512m #定义了一个存储区域名字,缓存大小
inactive=1d max_size=40g; #不活动的数据在缓存中多长时间,目录总大小
在 server location 标签添加如下:
location ~ .<em>.(php|php7)?$
{
fastcgi_pass 127.0.0.1:9000;
fastcgi_index index.php;
include fastcgi.conf;
fastcgi_cache ngx_fcgi_cache;
fastcgi_cache_valid 200 302 1h;
fastcgi_cache_valid 301 1d;
fastcgi_cache_valid any 1m;
fastcgi_cache_min_uses 1;
fastcgi_cache_use_stale error timeout invalid_header http_500;
fastcgi_cache_key http://$host$request_uri;
}
[root@lnmp http]# mkdir /data/ngx_fcgi_cache -pv6.11 IP 和 301 优化
有时候,我们发现访问网站的时候,使用 IP 也是可以得,我们可以把这一层给屏蔽掉,让其直接反馈给403,也可以做跳转
1)跳转的做法
server {
listen 80 default_server;
server_name _;
rewrite ^ http://www.baidu.com$request_uri?;
}2)403 反馈的做法
server {
listen 80 default_server;
server_name _;
return 403;
}3)301 跳转的做法,如我们域名一般在解析的过程中,a.com 一般会跳转到 www.a.com
server {
listen 80;
root /usr/share/nginx/html/;
server_name www.a.com a.com;
if ($host = 'a.com' ) {
rewrite ^/(.</em>)$ http://www.a.com/$1 permanent;
}
}6.12 gzip 调优
官方文档:https://nginx.org/en/docs/http/ngx_http_gzip_module.html
使用gzip压缩功能,可能为我们节约带宽,加快传输速度,有更好的体验,也为我们节约成本,所以说这是一个重点。
Nginx启用压缩功能需要你来ngx_http_gzip_module模块,apache使用的是mod_deflate。
一般我们需要压缩的内容有:文本,js,html,css,对于图片,视频,flash什么的不压缩,同时也要注意,我们使用gzip的功能是需要消耗CPU的!
gzip on;
gzip_min_length 2k;
gzip_buffers   4 32k;
gzip_http_version 1.1;
gzip_comp_level 6;
gzip_types text/plain text/css image/jpeg image/png image/jpg;
gzip_vary on;
gzip_proxied any;
字段的含义:
</li>
</ul>
<ul>
<li>gzip_min_length 1k :设置允许压缩的页面最小字节数,页面字节数从header头的Content-Length中获取,默认值是0,不管页面多大都进行压缩,建议设置成大于1K,如果小与1K可能会越压越大。
</li>
<li>gzip_buffers 4 32k :压缩缓冲区大小,表示申请4个单位为32K的内存作为压缩结果流缓存,默认值是申请与原始数据大小相同的内存空间来存储gzip压缩结果。
</li>
<li>gzip_http_version 1.1 :压缩版本,用于设置识别HTTP协议版本,默认是1.1,目前大部分浏览器已经支持GZIP解压,使用默认即可。
</li>
<li>gzip_comp_level 6 :压缩比例,用来指定GZIP压缩比,1压缩比最小,处理速度最快,9压缩比最大,传输速度快,但是处理慢,也比较消耗CPU资源。
</li>
<li>gzip_types text/css text/xml application/javascript :用来指定压缩的类型,‘text/html’类型总是会被压缩。默认值: gzip_types text/html (默认不对js/css文件进行压缩)
</li>
<li>
<ul>
<li>压缩类型,匹配MIME型进行压缩;</li>
<li>不能用通配符 text/*;</li>
<li>text/html默认已经压缩 (无论是否指定);</li>
<li>设置哪压缩种文本文件可参考 conf/mime.types。
</li>
</ul>
</li>
<li>gzip_vary on :varyheader支持,改选项可以让前端的缓存服务器缓存经过GZIP压缩的页面,例如用Squid缓存经过nginx压缩的数据。6.13 expires 缓存
缓存,主要针对于图片,css,js等元素更改机会比较少的情况下使用,特别是图片,占用带宽大,我们完全可以设置图片在浏览器本地缓存365天,css,js,html可以缓存个10来天,这样用户第一次打开加载慢一点,第二次,就非常快了!缓存的时候,我们需要将需要缓存的拓展名列出来, Expires缓存配置在server字段里面或者http段里
#配置在server段
location ~* .(ico|jpe?g|gif|png|bmp|swf|flv)$ {
expires 30d;
#log_not_found off;
access_log off;
}
location ~* .(js|css)$ {
expires 7d;
log_not_found off;
access_log off;
}
同时也可以对目录及其进行判断
location ~ ^/(images|javascript|js|css|flash|media|static)/ {
expires 360d;
}
location ~(robots.txt) {
expires 7d;
break;
}
或者
#配置在http段
expires 1h;注:log_not_found off;是否在error_log中记录不存在的错误。默认是。
总结:
expire功能优点:
</li>
<li>expires可以降低网站购买的带宽,节约成本;</li>
<li>同时提升用户访问体验;</li>
<li>减轻服务的压力,节约服务器成本,是web服务非常重要的功能。
expire功能缺点:
</li>
<li>被缓存的页面或数据更新了,用户看到的可能还是旧的内容,反而影响用户体验。
解决办法:第一个缩短缓存时间,例如:1天,但不彻底,除非更新频率大于1天;第二个对缓存的对象改名。
网站不希望被缓存的内容:
</li>
<li>网站流量统计工具;</li>
<li>更新频繁的文件(google的logo)。6.14 防盗链
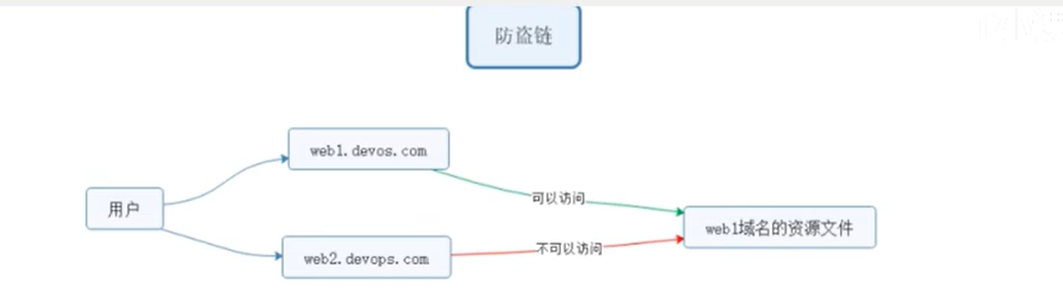
防止别人直接从你网站引用图片等链接,消耗了你的资源和网络流量,那么我们的解决办法由几种:
1. 水印,品牌宣传,你的带宽,服务器足够;</li>
</ul>
<ol start="2">
<li>防火墙,直接控制,前提是你知道IP来源;</li>
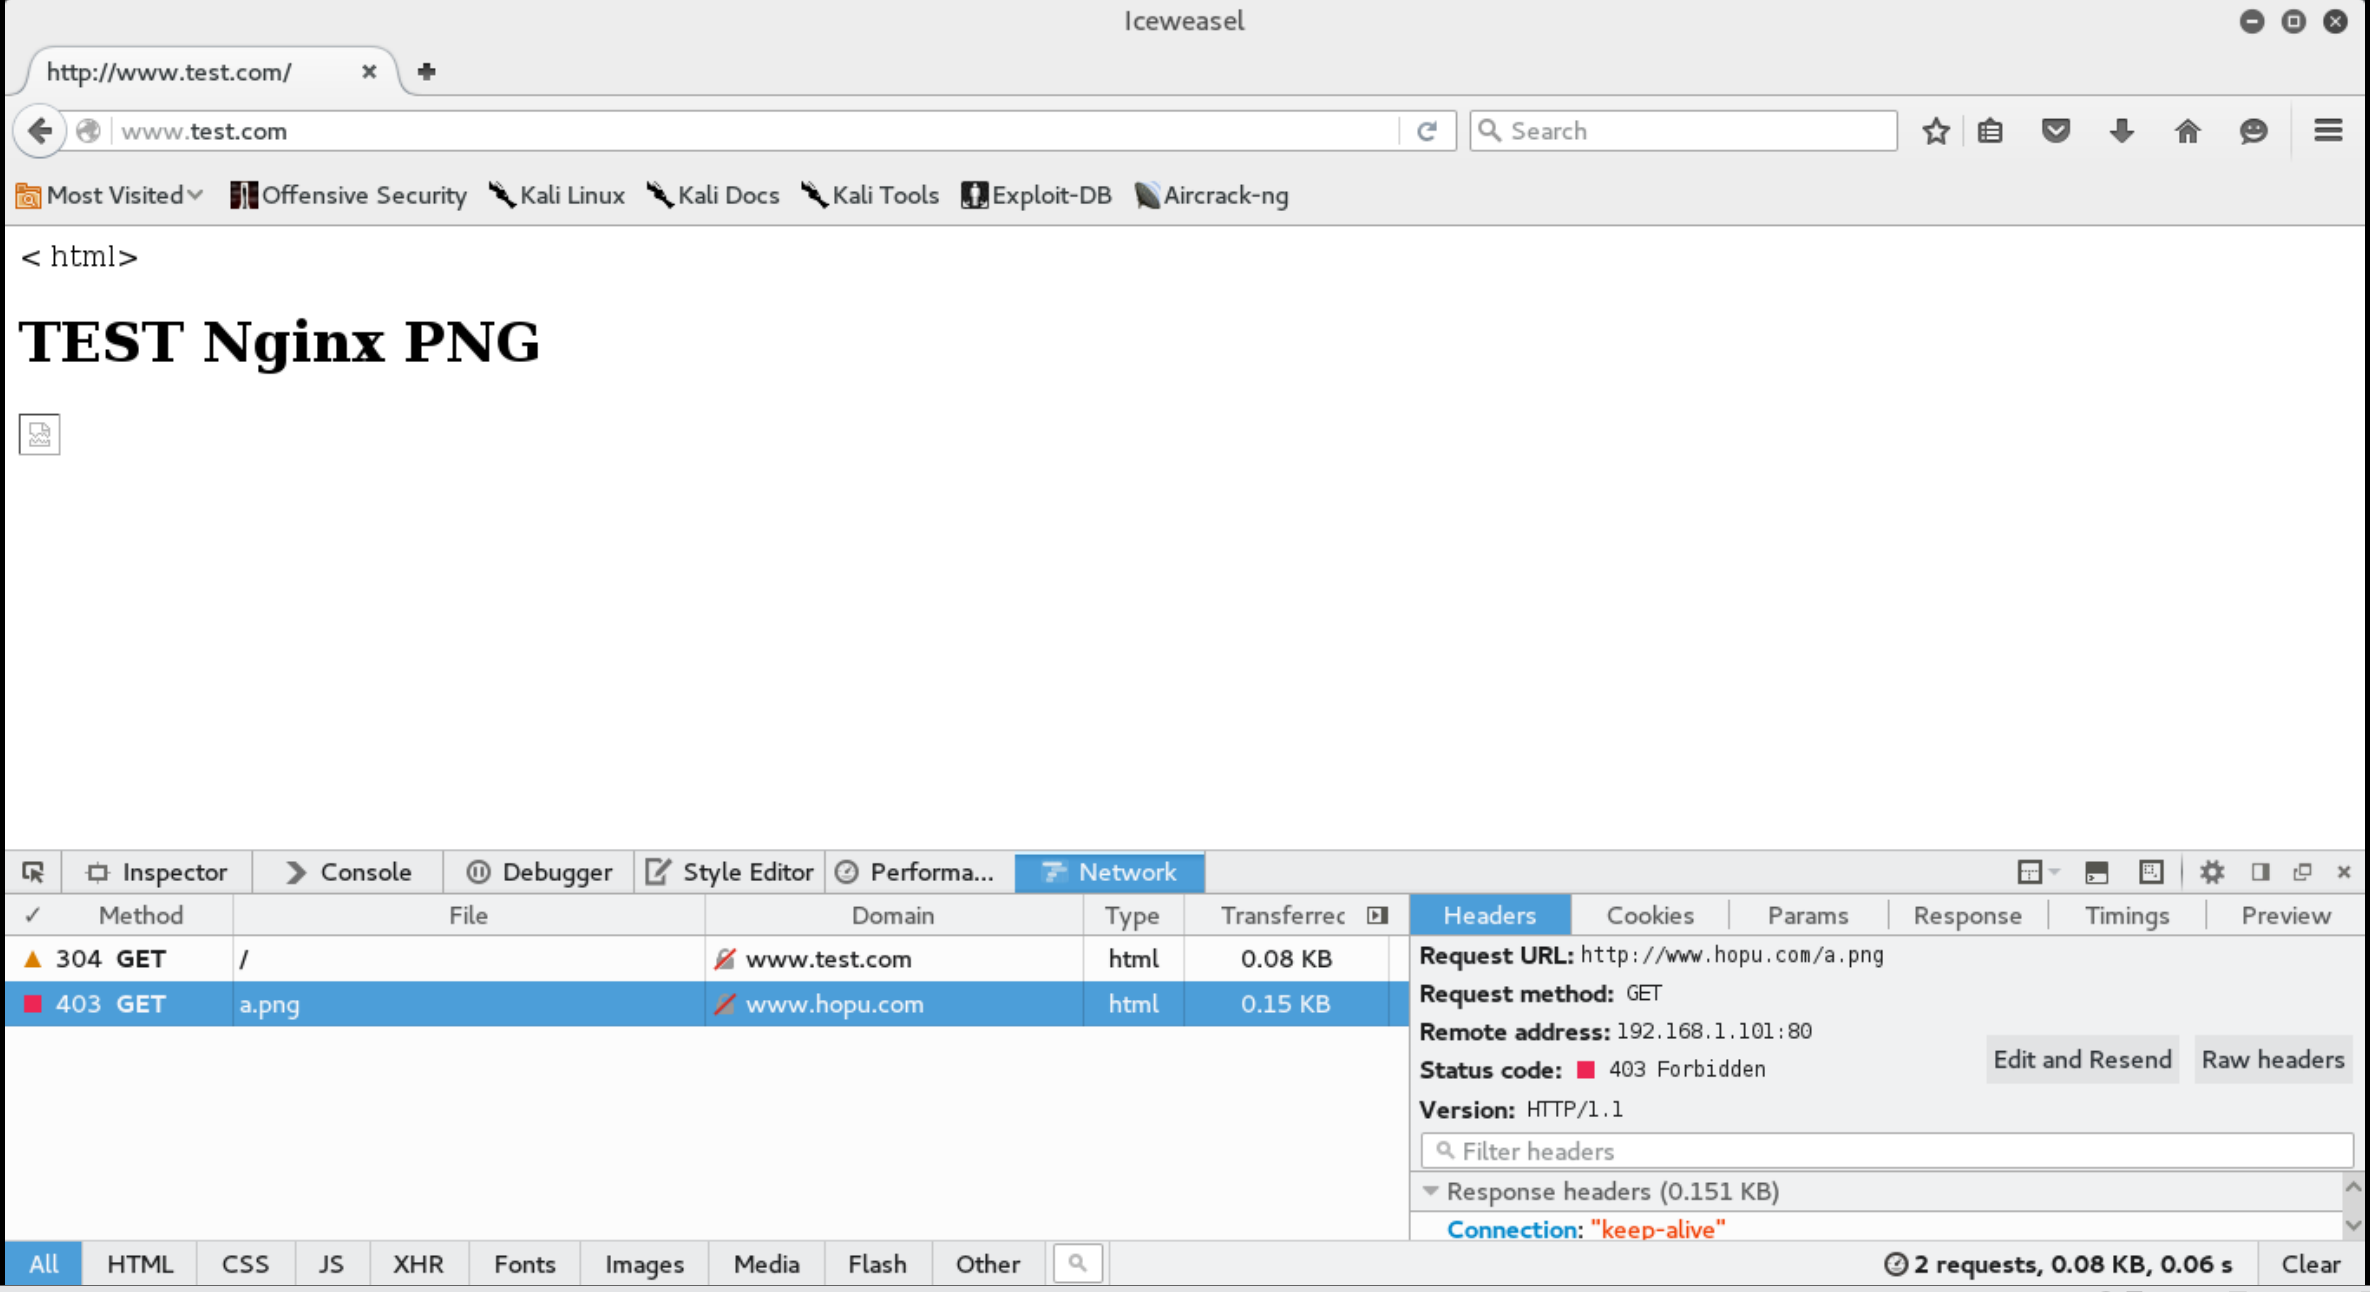
<li>防盗链策略下面的方法是直接给予403的错误提示。location ~* .(gif|jpg|png|swf|flv)$ {
valid_referers none blocked www.hopu.com hopu.com ;
if ($invalid_referer) {
return 403;
}
}参数可以使如下形式:
none :意思是不存在的Referer头(表示空的,也就是直接访问,比如直接在浏览器打开一个图片)。
blocked :意为根据防火墙伪装Referer头,如:“Referer:XXXXXXX”。
server_names :为一个或多个服务器的列表
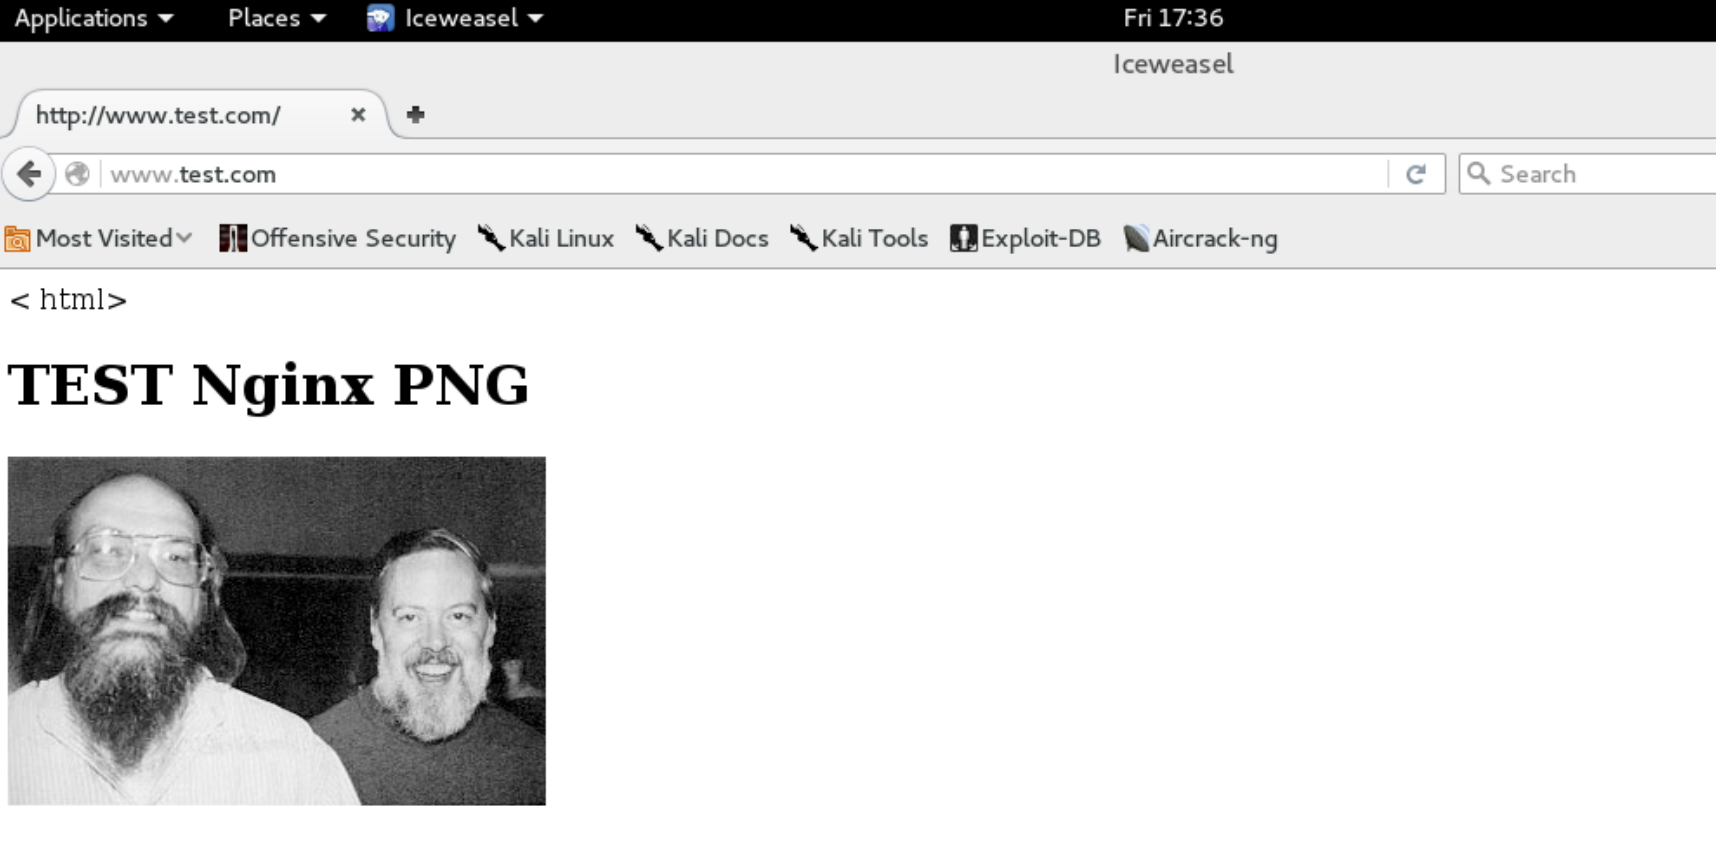
测试:找另外一个服务器,安装nginx,新建如下的index.html的页面,代码如下
< html>
<h1>TEST Nginx PNG </h1>
<img src="http://www.hopu.com/a.png">
</html>
这是没有做限制之前的访问界面
这是限制之后的页面,反馈的是403
6.15 防止 DDOS 攻击
官方网站:http://nginx.org/en/docs/http/ngx_http_limit_conn_module.html
通过使用 limit_conn_zone 进行控制单个 IP 或者域名的访问次数 ,http 字段中配置
http
{
limit_conn_zone $binary_remote_addr zone=addr:10m;
限制连接数:
要限制连接,必须先有一个容器对连接进行计数,在http段加入如下代码:
"zone=" 给它一个名字,可以随便叫,这个名字要跟下面的 limit_conn 一致
$binary_remote_addr = 用二进制来储存客户端的地址,1m 可以储存 32000 个并发会话接下来需要对server不同的位置(location段)进行限速,比如限制每个IP并发连接数为1,则
server
{
listen 80;
server_name 192.168.1.10;
index index.html index.htm index.php;
limit_conn addr 1; #是限制每个IP只能发起1个连接 (addr 要跟 limit_conn_zone 的变量对应)
limit_rate 100k; #限速为 100KB/秒
root html;
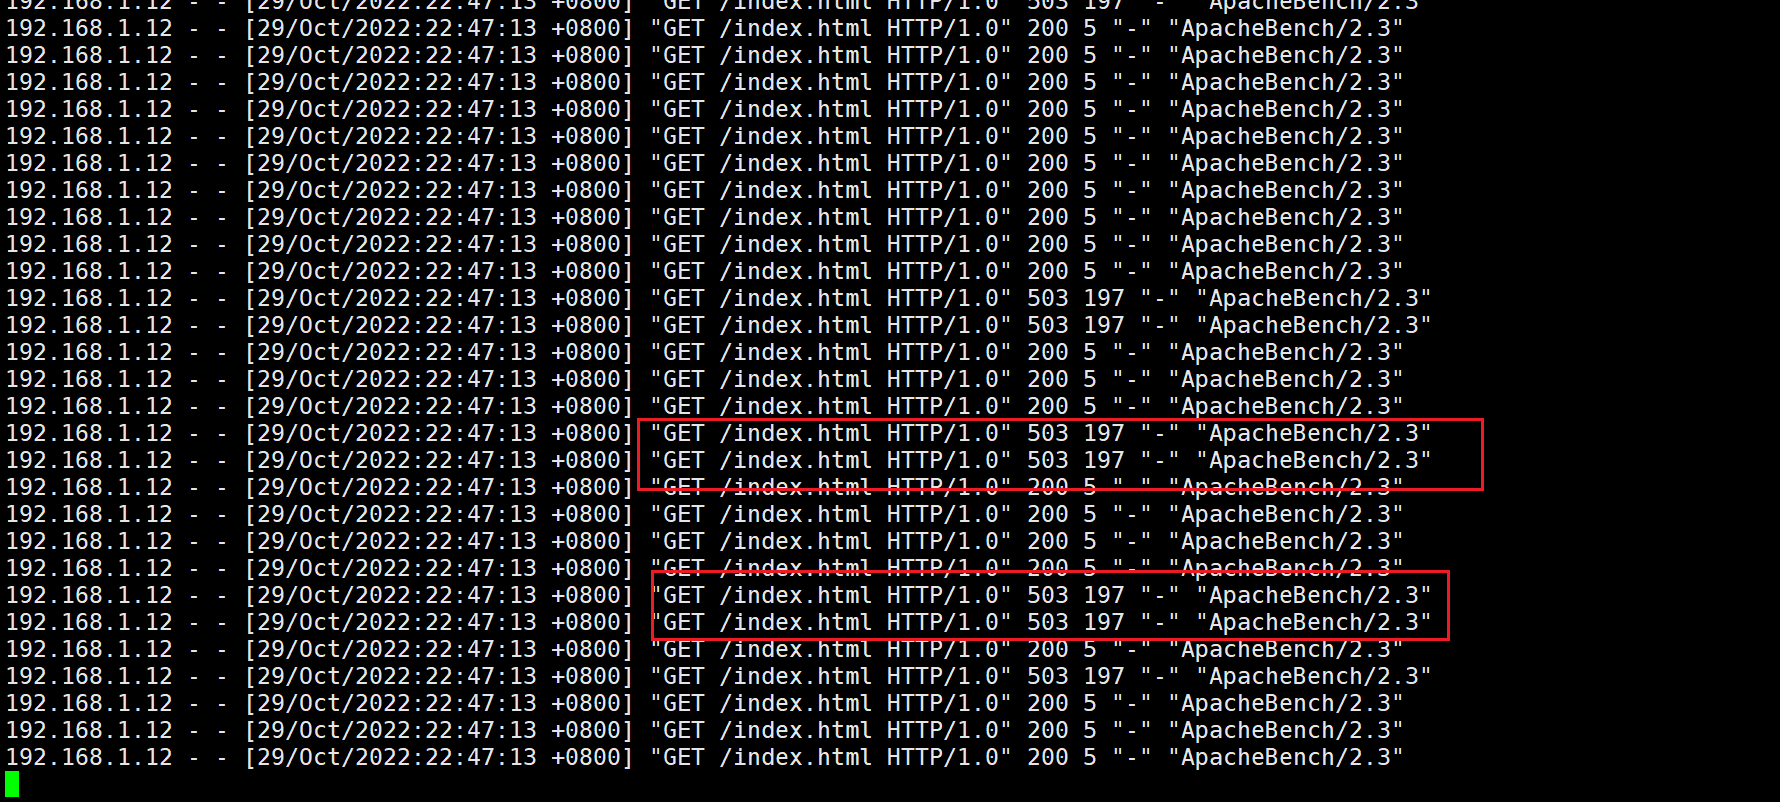
}测试:找一台服务器安装ab压测工具
[root@server2 ~]# yum -y install httpd-tools
[root@server2 ~]# ab -c 1000 -t 10 http://192.168.1.10/index.html
查看访问日志,结果出现了大量的503,503状态码意味着服务不可用。
七、总结
Nginx 是一个流行的 Web 服务器和反向代理服务器,它被广泛用于优化 Web 应用程序的性能、可靠性和可扩展性。在实际应用中,Nginx 具有许多强大的功能和选项,我们要学会如何配置nginx,这里要求掌握nginx的平滑升级和虚拟主机,SSL配置等功能,同时在nginx中还有很多第三方的扩展模块,要学会如何去配置和安装,其次在生产中,对域名的重写功能也是一个重点。
总之,Nginx 是一个非常强大的 Web 服务器和反向代理服务器,它具有丰富的功能和选项,可以优化 Web 应用程序的性能、可靠性和可扩展性。在实际应用中,Nginx 可以用于负载均衡、缓存、SSL 加密等功能,从而提高网站的性能和安全性。